The wxPython Linux tutorial
Table of Contents:
Contents
-
The wxPython Linux tutorial
- Foreword
- wxPython API
- First Steps
- Layout Management
- Basic Objects
- Events
- Dialogs
- Core Widgets
- wx.lib Classes
- Advanced Widgets
- Creating a taskbar application
- wx.TheClipboard
- Drag and Drop
- Plotting
- Configuring application settings
- wxPython functions
- Using xml resource files
- Skeletons
- Tips And Tricks
- Gripts
- Appendix
- Comments...
Foreword
The purpose of this tutorial is to get you started with the wxPython toolkit, from the basics to the advanced topics.
It has lots of code examples, not much talking. After that, you will be able to dig in yourself.
- mailing list
- reference book
- source code of wxPython applications
- /home/vronskij/bin/wxPython/usr/lib/python2.4/site-packages/wx-2.6-gtk2-unicode/wx - the ultimate resource, on my Linux box
There are three decent toolkits for the python programming language :
wxPython
PyQt
PyGTK
Note that this tutorial is done on Linux but the scripts work correctly on Windows :
- Tested py3.x, wx4.x and Win10).
Icons and images :
- Icons used in this tutorial: icons.tgz
- Images used in this tutorial: images.tgz
Jan Bodnar 2005 - 2007.
Status update. (april 2007).
All my work on wxPython tutorial has been moved to my website :
http://www.zetcode.com/wxpython
https://github.com/janbodnar/wxPython-examples
Here I shall not add any more examples. If I find myself some time, I will do some polishing.
wxPython API
wxPython API is a set of functions and widgets. Widgets are essential building blocks of a GUI application. Under Windows widgets are calles controls. We can roughly divide programmers into two groups. They code applications or libraries. In our case, wxPython is a library that is used by application programmers to code applications. Technically, wxPython is a wrapper over a C++ GUI API called wxWidgets. So it is not a native API. e.g. not written directly in Python. The only native GUI library for an interpreted language that I know is Java's Swing library.
In wxPython we have lot's of widgets. These can be divided into some logical groups.
Base Widgets
These widgets provide basic functionality for derived widgets. They are usually not used directly.
wx.Window
wx.Control
wx.ControlWithItem
Top level Widgets
These widgets exist independently of each other.
wx.Frame
wx.MDIParentFrame
wx.MDIChildFrame
wx.Dialog
wx.PopupWindow
Containers
Containers contain other widgets. These widgets are called children.
wx.Panel
wx.Notebook
wx.ScrolledWindow
wx.SplitterWindow
Dynamic Widgets
These widgets can be edited by users.
wx.Button
wx.BitmapButton
wx.Choice
wx.ComboBox
wx.CheckBox
wx.Grid
wx.ListBox
wx.RadioBox
wx.RadioButton
wx.ScrollBar
wx.SpinButton
wx.SpinCtrl
wx.Slider
wx.TextCtrl
wx.ToggleButton
Static Widgets
These widgets display informatin. They cannot be edited by user.
wx.Gauge
wx.StaticText
wx.StaticBitmap
wx.StaticLine
wx.StaticBox
Other Widgets
These widgets implement statusbar, toolbar and menubar in an application.
wx.MenuBar
wx.ToolBar
wx.StatusBar
First Steps
We start with a simple example.
In every wxPython application, we must import the wx library.
import wx
An application object is created by initiating class wx.App.
app = wx.App()
We create a frame widget. The window pops up only if we call Show() method on a widget.
frame = wx.Frame(None, -1, "simple.py")
frame.Show()
The last line enters a Mainloop. A mainloop is an endless cycle that catches up all events coming up to your application. It is an integral part of any windows GUI application.
app.MainLoop()
Although the code is very simple, you can do a lot of things with your window. You can maximize it, minimize it, move it, resize it. All these things have been already done.
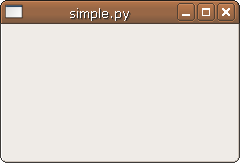
Figure: simple.py
wx.Window
wx.Window is a base class out of which many widgets inherit. For instance, the wx.Frame widget inherits from wx.Window. Technically it means that we can use wx.Window's methods for all descendants. We will introduce here some of its methods.
SetTitle(string title) - Sets the window's title. Applicable only to frames and dialogs.
SetToolTip(wx.ToolTip tip) - Attaches a tooltip to the window.
SetSize(wx.Size size) - Sets the size of the window.
SetPosition(wx.Point pos) - Positions the window to given coordinates
Show(show=True) - Shows or hides the window. show parameter can be True or False.
Move(wx.Point pos) - Moves the window to the given position.
SetCursor(wx.StockCursor id) - Sets the window's cursor.
   1 #!/usr/bin/python
   2
   3 # simple2.py
   4
   5 import wx
   6
   7 #---------------------------------------------------------------------------
   8
   9 app = wx.App()
  10
  11 frame = wx.Frame(None, -1, '')
  12 frame.SetToolTip(wx.ToolTip('This is a frame'))
  13 frame.SetCursor(wx.Cursor(wx.CURSOR_MAGNIFIER))
  14 frame.SetPosition(wx.Point(0,0))
  15 frame.SetSize(wx.Size(300,250))
  16 frame.SetTitle('Simple2.py')
  17 frame.Show()
  18
  19 app.MainLoop()
We create a 'This is a frame' tooltip. The cursor is set to a magnifier cursor. Possible cursor id's: are listed below We position the window to the upper left corner and size it to 300x250 pixels. Title is set to 'simple2.py'.
wx.Frame
Link :
https://wiki.wxpython.org/How%20to%20create%20a%20frame%20%28Phoenix%29
![]()
Figure: icon.py
wx.MenuBar
To set up a menubar in your wxPython application is pretty simple. We will discuss adding menus to menubar, adding submenus to existing menus. Each menu consists of menuitems. Menuitems can be normal items, check items or radio items.
First thing to do is to create a menubar.
menubar = wx.MenuBar()
Then we create our menus.
file = wx.Menu()
edit = wx.Menu()
help = wx.Menu()
Then we add some items into the menu. This can be done in two ways.
file.Append(101, '&Open', 'Open a new document')
file.Append(102, '&Save', 'Save the document')
We can separate logical sections in menus with a horizontal line.
file.AppendSeparator()
If you want to have some icons in your menus, you need to create MenuItem objects manually.
quit = wx.MenuItem(file, 105, '&Quit\tCtrl+Q', 'Quit the Application')
quit.SetBitmap(wx.Image('stock_exit-16.png',wx.BITMAP_TYPE_PNG).ConvertToBitmap())
file.Append(quit)
wxPython toolkit can only put bitmaps into menus. Therefore we need to convert our PNG files into bitmaps.
Menus are then added into the menubar.
menubar.Append(file, '&File')
menubar.Append(edit, '&Edit')
menubar.Append(help, '&Help')
Finally we set up our menubar in our application class.
self.SetMenuBar(menubar)
Let's sum it up in a small script.
   1 #!/usr/bin/python
   2
   3 # menu1.py
   4
   5 import wx
   6
   7 #---------------------------------------------------------------------------
   8
   9 class MyMenu(wx.Frame):
  10     def __init__(self, parent, id, title):
  11         wx.Frame.__init__(self, parent, id, title,
  12                           wx.DefaultPosition, wx.Size(300, 200))
  13
  14         menubar = wx.MenuBar()
  15
  16         file = wx.Menu()
  17         edit = wx.Menu()
  18         help = wx.Menu()
  19
  20         file.Append(101, '&Open', 'Open a new document')
  21         file.Append(102, '&Save', 'Save the document')
  22         file.AppendSeparator()
  23         quit = wx.MenuItem(file, 105, '&Quit\tCtrl+Q', 'Quit the Application')
  24         quit.SetBitmap(wx.Image('stock_exit-16.png', wx.BITMAP_TYPE_PNG).ConvertToBitmap())
  25         file.Append(quit)
  26
  27         menubar.Append(file, '&File')
  28         menubar.Append(edit, '&Edit')
  29         menubar.Append(help, '&Help')
  30
  31         self.SetMenuBar(menubar)
  32
  33         #------------
  34
  35         self.Bind(wx.EVT_MENU, self.OnQuit, id=105)
  36
  37         #------------
  38
  39         self.CreateStatusBar()
  40
  41     #-----------------------------------------------------------------------
  42
  43     def OnQuit(self, event):
  44         self.Close()
  45
  46 #---------------------------------------------------------------------------
  47
  48 class MyApp(wx.App):
  49     def OnInit(self):
  50         frame = MyMenu(None, -1, 'Menu1.py')
  51         frame.Show(True)
  52
  53         return True
  54
  55 #---------------------------------------------------------------------------
  56
  57 app = MyApp(0)
  58 app.MainLoop()
So far we have seen the default, normal menu items. Here we see, how we can explicitly define check items, normal items or radio items.
edit.Append(201, 'check item1', '', wx.ITEM_CHECK)
edit.Append(202, 'check item2', '', kind=wx.ITEM_CHECK)
or
quit = wx.MenuItem(file, 105, '&Quit\tCtrl+Q', 'Quit the Application', wx.ITEM_NORMAL)
The parameter is called kind.
Possible wx.ItemKind-s
- wx.ITEM_NORMAL - default item
- wx.ITEM_CHECK - check item
- wx.ITEM_RADIO - radio item
If you want to create a submenu, you create a menu first.
submenu = wx.Menu()
Then append some menu items into this submenu.
submenu.Append(301, 'radio item1', kind=wx.ITEM_RADIO)
submenu.Append(302, 'radio item2', kind=wx.ITEM_RADIO)
submenu.Append(302, 'radio item3', kind=wx.ITEM_RADIO)
You finish with adding a submenu into a menu object.
edit.Append(203, 'submenu', submenu)
We now discuss how to respond to user actions. We will touch on it only briefly and explain it later in more detail.
So when a user of our application selects a menu item, an event is generated. We must provide an event handler, that will react to this event accordingly. Handling events in wxPython is the most elegant and simple that I have seen so far. When we look into the reference book, we find wx.EVT_MENU handler under Event handling section.
Suppose we want to add an event handler to our quit menu item.
self.Bind(wx.EVT_MENU, self.OnQuit, id=105)
We need to provide three pieces of information. The object, where we bind our event handler. In our case self, the application's main object. The id of the corresponding menu item. And the method name, which will do our job.
The method which will react to user actions has two parameters. The first one is the object where this method is defined. The second one is the generated event. This time, we do without it. We simply close our application.
def OnQuit(self, event):
    self.Close()
The following script demonstrates various menu items, submenu and one simple event handler. I hate when my application window pops up somewhere in the corner by the will of the allmighty window manager. So I added
self.Centre()
so that the window pops up in the center of the screen.
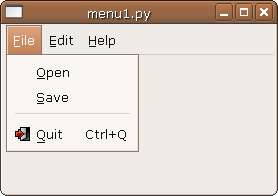
Figure: menu1.py
   1 #!/usr/bin/python
   2
   3 # menu2.py
   4
   5 import wx
   6
   7 #---------------------------------------------------------------------------
   8
   9 class MyMenu(wx.Frame):
  10     def __init__(self, parent, id, title):
  11         wx.Frame.__init__(self, parent, id, title,
  12                           wx.DefaultPosition, wx.Size(380, 250))
  13
  14         menubar = wx.MenuBar()
  15
  16         file = wx.Menu()
  17         edit = wx.Menu()
  18         help = wx.Menu()
  19
  20         file.Append(101, '&Open', 'Open a new document')
  21         file.Append(102, '&Save', 'Save the document')
  22         file.AppendSeparator()
  23         quit = wx.MenuItem(file, 105, '&Quit\tCtrl+Q', 'Quit the Application')
  24         quit.SetBitmap(wx.Image('stock_exit-16.png',wx.BITMAP_TYPE_PNG).ConvertToBitmap())
  25         file.Append(quit)
  26
  27         edit.Append(201, 'check item1', '', wx.ITEM_CHECK)
  28         edit.Append(202, 'check item2', kind=wx.ITEM_CHECK)
  29         submenu = wx.Menu()
  30         submenu.Append(301, 'radio item1', kind=wx.ITEM_RADIO)
  31         submenu.Append(302, 'radio item2', kind=wx.ITEM_RADIO)
  32         submenu.Append(303, 'radio item3', kind=wx.ITEM_RADIO)
  33         edit.Append(203, 'submenu', submenu)
  34
  35         menubar.Append(file, '&File')
  36         menubar.Append(edit, '&Edit')
  37         menubar.Append(help, '&Help')
  38
  39         self.SetMenuBar(menubar)
  40
  41         #------------
  42
  43         self.Bind(wx.EVT_MENU, self.OnQuit, id=105)
  44
  45         #------------
  46
  47         self.Centre()
  48
  49     #-----------------------------------------------------------------------
  50
  51     def OnQuit(self, event):
  52         self.Close()
  53
  54 #---------------------------------------------------------------------------
  55
  56 class MyApp(wx.App):
  57     def OnInit(self):
  58         frame = MyMenu(None, -1, 'Menu2.py')
  59         frame.Show(True)
  60
  61         return True
  62
  63 #---------------------------------------------------------------------------
  64
  65 app = MyApp(0)
  66 app.MainLoop()
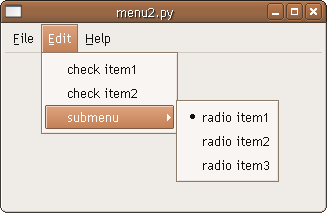
Figure: menu2.py
wx.ToolBar
Link : https://wiki.wxpython.org/How%20to%20create%20a%20tool%20bar%20%28Phoenix%29
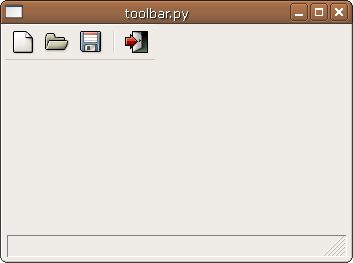
Figure: toolbar.py
Layout Management
There are basically two methods for layout of our widgets. The first method is manual. We place widgets by specifying the position in the constructor of the widget.
   1 #!/usr/bin/python
   2
   3 # layout.py
   4
   5 import wx
   6
   7 #---------------------------------------------------------------------------
   8
   9 class MyFrame(wx.Frame):
  10     def __init__(self, parent, id, title):
  11         wx.Frame.__init__(self, parent, id, title,
  12                           wx.DefaultPosition, wx.Size(300, 100))
  13
  14         panel = wx.Panel(self, -1)
  15
  16         wx.Button(panel, -1, "Button1", (0, 0))
  17         wx.Button(panel, -1, "Button2", (80, 0))
  18         wx.Button(panel, -1, "Button3", (160, 0))
  19
  20 #---------------------------------------------------------------------------
  21
  22 class MyApp(wx.App):
  23     def OnInit(self):
  24         frame = MyFrame(None, -1, 'Layout.py')
  25         frame.Show(True)
  26         frame.Centre()
  27
  28         return True
  29
  30 #---------------------------------------------------------------------------
  31
  32 app = MyApp(0)
  33 app.MainLoop()
When the window is resized, the size and the position of buttons do not change. This is one of the main features of the manual positioning of the widgets.

Figure: layout.py
The second method is to use layout managers. This method is prevalent in real programs. Basically you use sizers. We will discuss
wx.BoxSizer
wx.StaticBoxSizer
wx.GridSizer
wx.GridBagSizer
wx.BoxSizer
Link : https://wiki.wxpython.org/How%20to%20create%20a%20box%20sizer%20%28Phoenix%29

Figure: wxboxsizer.py
Borders
We show four various border styles available in wxPython. Border is a simple window decoration.
Available Borders:
- wx.SIMPLE_BORDER
- wx.RAISED_BORDER
- wx.SUNKEN_BORDER
- wx.NO_BORDER
   1 #!/usr/bin/python
   2
   3 # borders.py
   4
   5 import wx
   6
   7 #---------------------------------------------------------------------------
   8
   9 class MyFrame(wx.Frame):
  10     def __init__(self, parent, id, title):
  11         wx.Frame.__init__(self, parent, id, title)
  12
  13         pnl1 = wx.Panel(self, -1, style=wx.SIMPLE_BORDER)
  14         pnl2 = wx.Panel(self, -1, style=wx.RAISED_BORDER)
  15         pnl3 = wx.Panel(self, -1, style=wx.SUNKEN_BORDER)
  16         pnl4 = wx.Panel(self, -1, style=wx.NO_BORDER)
  17
  18         #------------
  19
  20         hbox = wx.BoxSizer(wx.HORIZONTAL)
  21
  22         hbox.Add(pnl1, 1, wx.EXPAND | wx.ALL, 3)
  23         hbox.Add(pnl2, 1, wx.EXPAND | wx.ALL, 3)
  24         hbox.Add(pnl3, 1, wx.EXPAND | wx.ALL, 3)
  25         hbox.Add(pnl4, 1, wx.EXPAND | wx.ALL, 3)
  26
  27         self.SetSize((400, 120))
  28         self.SetSizer(hbox)
  29
  30         #------------
  31
  32         self.Centre()
  33
  34 #---------------------------------------------------------------------------
  35
  36 class MyApp(wx.App):
  37     def OnInit(self):
  38         frame = MyFrame(None, -1, 'Borders.py')
  39         frame.Show(True)
  40
  41         return True
  42
  43 #---------------------------------------------------------------------------
  44
  45 app = MyApp(0)
  46 app.MainLoop()
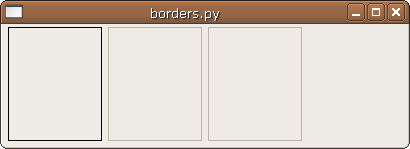
Figure: borders.py
wx.GridSizer
wx.GridSizer lays out its children in a two-dimensional table. The width of each field is the width of the widest child. The height of each field is the height of the tallest child.
wx.GridSizer(integer rows, integer cols, integer vgap, integer hgap)
In the constructor we provide the number of rows and the number of columns of our table and the horizontal and vertical gap between the children widgets. We insert our widgets into the table with the AddMany() method. Children are inserted from left to right, top to bottom.
   1 #!/usr/bin/python
   2
   3 # calculator.py
   4
   5 import wx
   6
   7 #---------------------------------------------------------------------------
   8
   9 class MyFrame(wx.Frame):
  10     def __init__(self, parent, id, title):
  11         wx.Frame.__init__(self, parent, id, title,
  12                           wx.DefaultPosition, wx.Size(300, 250))
  13
  14         self.formula = False
  15
  16         #------------
  17
  18         menubar = wx.MenuBar()
  19         file = wx.Menu()
  20         file.Append(22, '&Quit', 'Exit Calculator')
  21         menubar.Append(file, '&File')
  22         self.SetMenuBar(menubar)
  23
  24         #------------
  25
  26         self.display = wx.TextCtrl(self, -1, '',  style=wx.TE_RIGHT)
  27
  28         #------------
  29
  30         sizer = wx.BoxSizer(wx.VERTICAL)
  31         sizer.Add(self.display, 0, wx.EXPAND | wx.TOP | wx.BOTTOM, 4)
  32
  33         gs = wx.GridSizer(5, 4, 3, 3)
  34         gs.AddMany([(wx.Button(self, 20, 'Cls'), 0, wx.EXPAND),
  35                     (wx.Button(self, 21, 'Bck'), 0, wx.EXPAND),
  36                     (wx.StaticText(self, -1, ''), 0, wx.EXPAND),
  37                     (wx.Button(self, 22, 'Close'), 0, wx.EXPAND),
  38                     (wx.Button(self, 1, '7'), 0, wx.EXPAND),
  39                     (wx.Button(self, 2, '8'), 0, wx.EXPAND),
  40                     (wx.Button(self, 3, '9'), 0, wx.EXPAND),
  41                     (wx.Button(self, 4, '/'), 0, wx.EXPAND),
  42                     (wx.Button(self, 5, '4'), 0, wx.EXPAND),
  43                     (wx.Button(self, 6, '5'), 0, wx.EXPAND),
  44                     (wx.Button(self, 7, '6'), 0, wx.EXPAND),
  45                     (wx.Button(self, 8, '*'), 0, wx.EXPAND),
  46                     (wx.Button(self, 9, '1'), 0, wx.EXPAND),
  47                     (wx.Button(self, 10, '2'), 0, wx.EXPAND),
  48                     (wx.Button(self, 11, '3'), 0, wx.EXPAND),
  49                     (wx.Button(self, 12, '-'), 0, wx.EXPAND),
  50                     (wx.Button(self, 13, '0'), 0, wx.EXPAND),
  51                     (wx.Button(self, 14, '.'), 0, wx.EXPAND),
  52                     (wx.Button(self, 15, '='), 0, wx.EXPAND),
  53                     (wx.Button(self, 16, '+'), 0, wx.EXPAND)])
  54
  55         sizer.Add(gs, 1, wx.EXPAND)
  56         self.SetSizer(sizer)
  57
  58         #------------
  59
  60         self.Bind(wx.EVT_BUTTON, self.OnClear, id=20)
  61         self.Bind(wx.EVT_BUTTON, self.OnBackspace, id=21)
  62         self.Bind(wx.EVT_BUTTON, self.OnClose, id=22)
  63         self.Bind(wx.EVT_BUTTON, self.OnSeven, id=1)
  64         self.Bind(wx.EVT_BUTTON, self.OnEight, id=2)
  65         self.Bind(wx.EVT_BUTTON, self.OnNine, id=3)
  66         self.Bind(wx.EVT_BUTTON, self.OnDivide, id=4)
  67         self.Bind(wx.EVT_BUTTON, self.OnFour, id=5)
  68         self.Bind(wx.EVT_BUTTON, self.OnFive, id=6)
  69         self.Bind(wx.EVT_BUTTON, self.OnSix, id=7)
  70         self.Bind(wx.EVT_BUTTON, self.OnMultiply, id=8)
  71         self.Bind(wx.EVT_BUTTON, self.OnOne, id=9)
  72         self.Bind(wx.EVT_BUTTON, self.OnTwo, id=10)
  73         self.Bind(wx.EVT_BUTTON, self.OnThree, id=11)
  74         self.Bind(wx.EVT_BUTTON, self.OnMinus, id=12)
  75         self.Bind(wx.EVT_BUTTON, self.OnZero, id=13)
  76         self.Bind(wx.EVT_BUTTON, self.OnDot, id=14)
  77         self.Bind(wx.EVT_BUTTON, self.OnEqual, id=15)
  78         self.Bind(wx.EVT_BUTTON, self.OnPlus, id=16)
  79         self.Bind(wx.EVT_MENU, self.OnClose, id=22)
  80
  81         #------------
  82
  83         self.SetBackgroundColour("#eceade")
  84         self.SetMinSize((300, 250))
  85
  86         #------------
  87
  88         self.Centre()
  89
  90     #-----------------------------------------------------------------------
  91
  92     def OnClear(self, event):
  93         self.display.Clear()
  94
  95
  96     def OnBackspace(self, event):
  97         formula = self.display.GetValue()
  98         self.display.Clear()
  99         self.display.SetValue(formula[:-1])
 100
 101
 102     def OnClose(self, event):
 103         self.Close()
 104
 105
 106     def OnDivide(self, event):
 107         if self.formula:
 108             return
 109         self.display.AppendText('/')
 110
 111
 112     def OnMultiply(self, event):
 113         if self.formula:
 114             return
 115         self.display.AppendText('*')
 116
 117
 118     def OnMinus(self, event):
 119         if self.formula:
 120             return
 121         self.display.AppendText('-')
 122
 123
 124     def OnPlus(self, event):
 125         if self.formula:
 126             return
 127         self.display.AppendText('+')
 128
 129
 130     def OnDot(self, event):
 131         if self.formula:
 132             return
 133         self.display.AppendText('.')
 134
 135
 136     def OnEqual(self, event):
 137         if self.formula:
 138             return
 139         formula = self.display.GetValue()
 140         self.formula = False
 141         try:
 142             self.display.Clear()
 143             output = eval(formula)
 144             self.display.AppendText(str(output))
 145         except StandardError:
 146             self.display.AppendText("Error")
 147
 148
 149     def OnZero(self, event):
 150         if self.formula:
 151             self.display.Clear()
 152             self.formula = False
 153         self.display.AppendText('0')
 154
 155
 156     def OnOne(self, event):
 157         if self.formula:
 158             self.display.Clear()
 159             self.formula = False
 160         self.display.AppendText('1')
 161
 162
 163     def OnTwo(self, event):
 164         if self.formula:
 165             self.display.Clear()
 166             self.formula = False
 167         self.display.AppendText('2')
 168
 169
 170     def OnThree(self, event):
 171         if self.formula:
 172             self.display.Clear()
 173             self.formula = False
 174         self.display.AppendText('3')
 175
 176
 177     def OnFour(self, event):
 178         if self.formula:
 179             self.display.Clear()
 180             self.formula = False
 181         self.display.AppendText('4')
 182
 183
 184     def OnFive(self, event):
 185         if self.formula:
 186             self.display.Clear()
 187             self.formula = False
 188         self.display.AppendText('5')
 189
 190
 191     def OnSix(self, event):
 192         if self.formula:
 193             self.display.Clear()
 194             self.formula = False
 195         self.display.AppendText('6')
 196
 197
 198     def OnSeven(self, event):
 199         if self.formula:
 200             self.display.Clear()
 201             self.formula = False
 202         self.display.AppendText('7')
 203
 204
 205     def OnEight(self, event):
 206         if self.formula:
 207             self.display.Clear()
 208             self.formula = False
 209         self.display.AppendText('8')
 210
 211
 212     def OnNine(self, event):
 213         if self.formula:
 214             self.display.Clear()
 215             self.formula = False
 216         self.display.AppendText('9')
 217
 218 #---------------------------------------------------------------------------
 219
 220 class MyApp(wx.App):
 221     def OnInit(self):
 222         frame = MyFrame(None, -1, 'Calculator.py')
 223         frame.Show(True)
 224         self.SetTopWindow(frame)
 225
 226         return True
 227
 228 #---------------------------------------------------------------------------
 229
 230 app = MyApp(0)
 231 app.MainLoop()
The formula we input is processed by the eval built-in python function.
output = eval(formula)
If we make an error in our formula, an error message is displayed. Notice how we managed to put a space between the Bck and Close buttons. We simply put an empty wx.StaticText there. Such tricks are quite common.
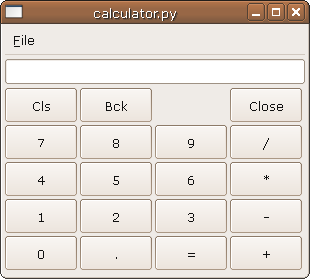
Figure: calculator.py
wx.GridBagSizer
Link : https://wiki.wxpython.org/How%20to%20create%20a%20grid%20bag%20sizer%20%28Phoenix%29
Basic Objects
wxPython is a collection of various objects. We can divide them into two groups.
- Visual objects
- Non-visual objects
Examples of visual objects are: widgets, fonts, colours or cursors. Non-visual objects: sizers, timers or events.
Cursors
A cursor is a simple graphical object. It is used to indicate position on the monitor or any other display device. It usually dynamically changes itself. Typically, when you hover a mouse pointer over a hypertext, the cursor changes to a hand.
In the next code example, we create a grid of nine wx.Panels. Each panel shows a different cursor.
   1 #!/usr/bin/python
   2
   3 # cursors.py
   4
   5 import wx
   6
   7 #---------------------------------------------------------------------------
   8
   9 class Cursors(wx.Frame):
  10     def __init__(self, parent, id, title):
  11         wx.Frame.__init__(self, parent, id, title)
  12
  13         cursors = [wx.CURSOR_ARROW, wx.CURSOR_HAND, wx.CURSOR_WATCH,
  14                    wx.CURSOR_SPRAYCAN, wx.CURSOR_PENCIL, wx.CURSOR_CROSS,
  15                    wx.CURSOR_QUESTION_ARROW, wx.CURSOR_POINT_LEFT,
  16                    wx.CURSOR_SIZING]
  17
  18         #------------
  19
  20         vbox = wx.BoxSizer(wx.VERTICAL)
  21         sizer = wx.GridSizer(3, 3, 2, 2)
  22
  23         for i in cursors:
  24             panel = wx.Panel(self, -1, style=wx.SUNKEN_BORDER)
  25             panel.SetCursor(wx.Cursor(i))
  26             sizer.Add(panel, flag=wx.EXPAND)
  27
  28         vbox.Add(sizer, 1, wx.EXPAND | wx.TOP, 5)
  29         self.SetSizer(vbox)
  30
  31         #------------
  32
  33         self.Centre()
  34
  35         #------------
  36
  37         self.Show(True)
  38
  39 #---------------------------------------------------------------------------
  40
  41 app = wx.App(0)
  42 Cursors(None, -1, 'Cursors.py')
  43 app.MainLoop()
Various predefined cursors: Listed below.
Fonts
We create different kinds of fonts with the wx.Font object. It has the following constructor:
wx.Font(integer pointSize, wx.FontFamily family, integer style, integer weight,
        bool underline = false, string faceName = '',
        wx.FontEncoding encoding = wx.FONTENCODING_DEFAULT)
The specified parameters can have the following options:
Family:
- wx.DEFAULT
- wx.DECORATIVE
- wx.ROMAN
- wx.SWISS
- wx.SCRIPT
- wx.MODERN
Style:
- wx.NORMAL
- wx.SLANT
- wx.ITALIC
Weight:
- wx.NORMAL
- wx.LIGHT
- wx.BOLD
fonts.py script shows three different fonts.
   1 #!/usr/bin/python
   2
   3 # fonts.py
   4
   5 import wx
   6
   7 #---------------------------------------------------------------------------
   8
   9 text1 = "Now listen to me mama\nMama mama\nYou're taking away my last chance\nDon't take it away"
  10
  11 text2 = '''You won't cry for my absence, I know -
  12 You forgot me long ago.
  13 Am I that unimportant...?
  14 Am I so insignificant...?
  15 Isn't something missing?
  16 Isn't someone missing me?'''
  17
  18 text3 = '''But if I had one wish fulfilled tonight
  19 I'd ask for the sun to never rise
  20 If God passed a mic to me to speak
  21 I'd say stay in bed, world
  22 Sleep in peace'''
  23
  24 #---------------------------------------------------------------------------
  25
  26 class MyFrame(wx.Frame):
  27     def __init__(self, parent, id, title):
  28         wx.Frame.__init__(self, parent, id, title,
  29                           wx.DefaultPosition, wx.Size(350, 360))
  30
  31         panel = wx.Panel(self, -1)
  32
  33         font1 = wx.Font(10, wx.SWISS, wx.ITALIC, wx.NORMAL)
  34         font2 = wx.Font(10, wx.ROMAN, wx.NORMAL, wx.NORMAL)
  35         font3 = wx.Font(10, wx.MODERN, wx.NORMAL, wx.BOLD)
  36
  37         lyrics1 = wx.StaticText(panel, -1, text1,(70, 15), style=wx.ALIGN_CENTRE)
  38         lyrics1.SetFont(font1)
  39
  40         lyrics2 = wx.StaticText(panel, -1, text2,(70, 100), style=wx.ALIGN_CENTRE)
  41         lyrics2.SetFont(font2)
  42
  43         lyrics3 = wx.StaticText(panel, -1, text3,(10, 220), style=wx.ALIGN_CENTRE)
  44         lyrics3.SetFont(font3)
  45
  46         #------------
  47
  48         self.Center()
  49
  50 #---------------------------------------------------------------------------
  51
  52 class MyApp(wx.App):
  53     def OnInit(self):
  54         frame = MyFrame(None, -1, 'Fonts.py')
  55         frame.Show(True)
  56         self.SetTopWindow(frame)
  57
  58         return True
  59
  60 #---------------------------------------------------------------------------
  61
  62 app = MyApp(0)
  63 app.MainLoop()
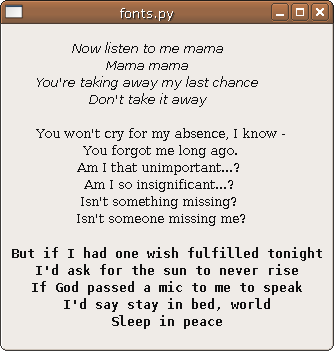
Figure: fonts.py
Colours
A colour is an object representing a combination of Red, Green, and Blue (RGB) intensity values. Valid RGB values are in the range 0 to 255.
There are three ways for setting colours. We can create a wx.Colour object, use a predefined colour name or use hex value string.
SetBackgroundColour(wx.Colour(0,0,255))
SetBackgroundColour('BLUE')              # A predefined colour name .
SetBackgroundColour('#0000FF')           # Hex value string.
Predefined colour names in wxPython:
- wx.BLACK
- wx.WHITE
- wx.RED
- wx.BLUE
- wx.GREEN
- wx.CYAN
- wx.LIGHT_GREY
Standard colour database:
colours.py script shows eight different colours. wxBlack is simple. sea green is poetic and #0000FF technical. It is up to the developer, what to choose.
   1 #!/usr/bin/python
   2
   3 # colours.py
   4
   5 import wx
   6
   7 #---------------------------------------------------------------------------
   8
   9 class Colours(wx.Dialog):
  10     def __init__(self, parent, id, title):
  11         wx.Dialog.__init__(self, parent, id, title, size=(300, 300))
  12
  13         self.pnl1 = wx.Panel(self, -1)
  14         self.pnl2 = wx.Panel(self, -1)
  15         self.pnl3 = wx.Panel(self, -1)
  16         self.pnl4 = wx.Panel(self, -1)
  17         self.pnl5 = wx.Panel(self, -1)
  18         self.pnl6 = wx.Panel(self, -1)
  19         self.pnl7 = wx.Panel(self, -1)
  20         self.pnl8 = wx.Panel(self, -1)
  21
  22         #------------
  23
  24         vbox = wx.BoxSizer(wx.VERTICAL)
  25
  26         gs = wx.GridSizer(4,2,3,3)
  27         gs.AddMany([ (self.pnl1, 0 ,wx.EXPAND),
  28             (self.pnl2, 0, wx.EXPAND),
  29             (self.pnl3, 0, wx.EXPAND),
  30             (self.pnl4, 0, wx.EXPAND),
  31             (self.pnl5, 0, wx.EXPAND),
  32             (self.pnl6, 0, wx.EXPAND),
  33             (self.pnl7, 0, wx.EXPAND),
  34             (self.pnl8, 0, wx.EXPAND) ])
  35
  36         vbox.Add(gs, 1, wx.EXPAND | wx.TOP, 5)
  37         self.SetSizer(vbox)
  38
  39         #------------
  40
  41         self.SetColors()
  42
  43         #------------
  44
  45         self.Centre()
  46
  47         #------------
  48
  49         self.ShowModal()
  50         self.Destroy()
  51
  52     #-----------------------------------------------------------------------
  53
  54     def SetColors(self):
  55         self.pnl1.SetBackgroundColour(wx.BLACK)
  56         self.pnl2.SetBackgroundColour(wx.Colour(139,105,20))
  57         self.pnl3.SetBackgroundColour(wx.RED)
  58         self.pnl4.SetBackgroundColour('#0000FF')
  59         self.pnl5.SetBackgroundColour('sea green')
  60         self.pnl6.SetBackgroundColour('midnight blue')
  61         self.pnl7.SetBackgroundColour(wx.LIGHT_GREY)
  62         self.pnl8.SetBackgroundColour('plum')
  63
  64 #---------------------------------------------------------------------------
  65
  66 app = wx.App(0)
  67 Colours(None, -1, 'Colours.py')
  68 app.MainLoop()
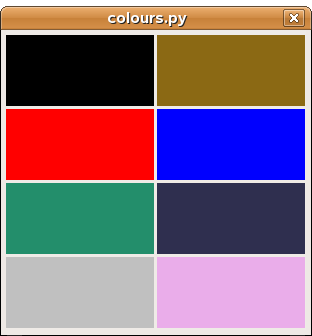
Figure: colours.py
The full database has currently about 630 different colour names. The list can be found in the colourdb.py file. It is also shown in the wxPython demo. In randomcolours.py script we have a single window. We change the background colour of the window to the randomly chosen colour.
   1 #!/usr/bin/python
   2
   3 # randomcolours.py
   4
   5 import wx
   6
   7 from random import randrange
   8 from wx.lib.colourdb import *
   9
  10 #---------------------------------------------------------------------------
  11
  12 class MyFrame(wx.Frame):
  13     def __init__(self, parent, id, title):
  14         wx.Frame.__init__(self, parent, id, title,
  15                           wx.DefaultPosition, wx.Size(400, 350))
  16
  17         self.panel = wx.Panel(self, -1)
  18
  19         self.colors = getColourList()
  20         self.col_num = len(self.colors)
  21
  22         #------------
  23
  24         self.timer = wx.Timer(self)
  25         self.timer.Start(1500)
  26         self.Bind(wx.EVT_TIMER, self.OnTimer, self.timer)
  27
  28         #------------
  29
  30         self.Centre()
  31
  32     #-----------------------------------------------------------------------
  33
  34     def OnTimer(self, event):
  35         self.panel.SetBackgroundColour(wx.RED)
  36         position = randrange(0, self.col_num-1, 1)
  37         self.panel.SetBackgroundColour(self.colors[position])
  38         self.panel.Refresh()
  39
  40 #---------------------------------------------------------------------------
  41
  42 class MyApp(wx.App):
  43     def OnInit(self):
  44         updateColourDB()
  45         frame = MyFrame(None, -1, 'Randomcolours.py')
  46         frame.Show(True)
  47         self.SetTopWindow(frame)
  48
  49         return True
  50
  51 #---------------------------------------------------------------------------
  52
  53 app = MyApp(0)
  54 app.MainLoop()
Bitmaps
There are two kinds of graphics. Vector and bitmap. With vector graphics, images are created with mathematical formulas that define all the shapes of the image. Geometric objects like curves and polygons are used. A bitmap or a bit map is a collection of bits that form an image. It is a grid of individual dots stored in memory or in a file. Each dot has its own colour. When the image is displayed, the computer transfers a bit map into pixels on monitors or ink dots on printers. The quality of a bitmap is determined by the resolution and the color depth of the image. The resolution is the total number of pixels in the image. The Color depth is the amount of information in each pixel.
There are various kinds of bitmaps:
- PNG
- JPEG
- GIF
- TIFF
- BMP
   1 #!/usr/bin/python
   2
   3 # bitmap.py
   4
   5 import wx
   6
   7 #---------------------------------------------------------------------------
   8
   9 class MyFrame(wx.Frame):
  10     def __init__(self, parent, id, title):
  11         wx.Frame.__init__(self, parent, id, title, size=(320, 300))
  12
  13         self.bitmap = wx.Bitmap('memento.jpg')
  14
  15         self.Bind(wx.EVT_PAINT, self.OnPaint)
  16
  17         self.Centre()
  18
  19     #-----------------------------------------------------------------------
  20
  21     def OnPaint(self, event):
  22         dc = wx.PaintDC(self)
  23         dc.DrawBitmap(self.bitmap, 80, 20)
  24
  25 #---------------------------------------------------------------------------
  26
  27 class MyApp(wx.App):
  28     def OnInit(self):
  29         frame = MyFrame(None, -1, 'bitmap.py (Memento)')
  30         frame.Show(True)
  31         self.SetTopWindow(frame)
  32
  33         return True
  34
  35 #---------------------------------------------------------------------------
  36
  37 app = MyApp(0)
  38 app.MainLoop()
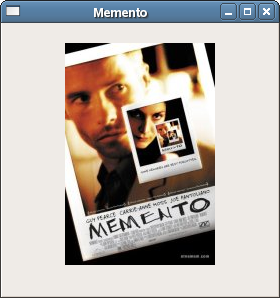
Figure: bitmap.py
Events
Events are integral part of every GUI application. All GUI applications are event-driven. An application reacts to different event types which are generated during its life. Events are generated mainly by the user of an application. But they can be generated by other means as well. e.g. internet connection, window manager, timer. So when we call MainLoop() method, our application waits for events to be generated. The MainLoop() method ends when we exit the application.
Working with events is straightforward in wxPython. There are three steps:
- Identify the event name: wx.EVT_SIZE, wx.EVT_CLOSE etc
- Create an event handler. It is a method, that is called, when an event is generated
- Bind an event to an event handler.
In wxPython we say to bind a method to an event. Sometimes a word hook is used.
You bind an event by calling the Bind() method. The method has the following parameters:
Bind(event, handler, source=None, id=wx.ID_ANY, id2=wx.ID_ANY)
- event is one of EVT_* objects. It specifies the type of the event.
- handler is an object to be called. In other words, it is a method, that a programmer binds to an event.
- source parameter is used when we want to differentiate between the same event type from different widgets.
- id parameter is used, when we have multiple buttons, menu items etc. The id is used to differentiate among them.
- id2 is used when it is desirable to bind a handler to a range of ids, such as with EVT_MENU_RANGE.
Note that method Bind() is defined in class EvtHandler. It is the class, from which wx.Window inherits. wx.Window is a base class for most widgets in wxPython. There is also a reverse process. If we want to unbind a method from an event, we call the Unbind() method. It has the same paremeters as the above one.
Possible events |
|
wx.Event |
the event base class |
wx.ActivateEvent |
a window or application activation event |
wx.CloseEvent |
a close window or end session event |
wx.EraseEvent |
an erase background event |
wx.FocusEvent |
a window focus event |
wx.KeyEvent |
a keypress event |
wx.IdleEvent |
an idle event |
wx.InitDialogEvent |
a dialog initialisation event |
wx.JoystickEvent |
a joystick event |
wx.MenuEvent |
a menu event |
wx.MouseEvent |
a mouse event |
wx.MoveEvent |
a move event |
wx.PaintEvent |
a paint event |
wx.QueryLayoutInfoEvent |
used to query layout information |
wx.SetCursorEvent |
used for special cursor processing based on current mouse position |
wx.SizeEvent |
a size event |
wx.ScrollWinEvent |
a scroll event sent by a built-in Scrollbar |
wx.ScrollEvent |
a scroll event sent by a stand-alone scrollbar |
wx.SysColourChangedEvent |
a system colour change event |
Examples
The following code is an example of a wx.ScrollWinEvent. This event is generated, when we click on a built in Scrollbar. Built-in Scrollbar is activated with the SetScrollbar() method call. For stand-alone Scrollbars, there is another event type, namely wx.ScrollEvent.
   1 #!/usr/bin/python
   2
   3 # myscrollwinevent.py
   4
   5 import wx
   6
   7 #---------------------------------------------------------------------------
   8
   9 class MyScrollWinEvent(wx.Frame):
  10     def __init__(self, parent, id, title):
  11         wx.Frame.__init__(self, parent, id, title)
  12
  13         panel = wx.Panel(self, -1)
  14         panel.SetScrollbar(wx.VERTICAL, 0, 6, 50)
  15         panel.Bind(wx.EVT_SCROLLWIN, self.OnScroll)
  16
  17         self.st = wx.StaticText(panel, -1, '0', (30, 0))
  18
  19         #------------
  20
  21         self.Centre()
  22
  23     #-----------------------------------------------------------------------
  24
  25     def OnScroll(self, evt):
  26         y = evt.GetPosition()
  27         self.st.SetLabel(str(y))
  28
  29 #---------------------------------------------------------------------------
  30
  31 class MyApp(wx.App):
  32     def OnInit(self):
  33         msw = MyScrollWinEvent(None, -1, 'Myscrollwinevent.py')
  34         msw.Show(True)
  35
  36         return True
  37
  38 #---------------------------------------------------------------------------
  39
  40 app = MyApp(0)
  41 app.MainLoop()
The wx.SizeEvent is generated, when our window is resized. In our example, we show the size of the window in the titlebar.
   1 #!/usr/bin/python
   2
   3 # sizeevent.py
   4
   5 import wx
   6
   7 #---------------------------------------------------------------------------
   8
   9 class SizeEvent(wx.Frame):
  10     def __init__(self, parent, id, title):
  11         wx.Frame.__init__(self, parent, id, title)
  12
  13         #------------
  14
  15         self.Bind(wx.EVT_SIZE, self.OnSize)
  16
  17         #------------
  18
  19         self.Centre()
  20
  21     #-----------------------------------------------------------------------
  22
  23     def OnSize(self, event):
  24         self.SetTitle(str("Size : %s" % event.GetSize()))
  25
  26 #---------------------------------------------------------------------------
  27
  28 class MyApp(wx.App):
  29     def OnInit(self):
  30         se = SizeEvent(None, -1, 'Sizeevent.py')
  31         se.Show(True)
  32
  33         return True
  34
  35 #---------------------------------------------------------------------------
  36
  37 app = MyApp(0)
  38 app.MainLoop()
   1 #!/usr/bin/python
   2
   3 # moveevent.py
   4
   5 import wx
   6
   7 #---------------------------------------------------------------------------
   8
   9 class MoveEvent(wx.Frame):
  10     def __init__(self, parent, id, title):
  11         wx.Frame.__init__(self, parent, id, title)
  12
  13         wx.StaticText(self, -1, 'x:', (10,0))
  14         wx.StaticText(self, -1, 'y:', (10,20))
  15
  16         self.st1 = wx.StaticText(self, -1, '', (30, 0))
  17         self.st2 = wx.StaticText(self, -1, '', (30, 20))
  18
  19         #------------
  20
  21         self.Bind(wx.EVT_MOVE, self.OnMove)
  22
  23         #------------
  24
  25         self.Centre()
  26
  27     #-----------------------------------------------------------------------
  28
  29     def OnMove(self, event):
  30         x, y = event.GetPosition()
  31         self.st1.SetLabel(str(x))
  32         self.st2.SetLabel(str(y))
  33
  34 #---------------------------------------------------------------------------
  35
  36 class MyApp(wx.App):
  37     def OnInit(self):
  38         me = MoveEvent(None, -1, 'Moveevent.py')
  39         me.Show(True)
  40
  41         return True
  42
  43 #---------------------------------------------------------------------------
  44
  45 app = MyApp(0)
  46 app.MainLoop()
A paint event is generated when a window is redrawn. This happens when we resize window, maximize it. A paint event can be generated programatically as well. For example, when we call SetLabel() method to change a wxStaticText widget. Note that when we minimize a window, no paint event is generated.
   1 #!/usr/bin/python
   2
   3 # paintevent.py
   4
   5 import wx
   6
   7 #---------------------------------------------------------------------------
   8
   9 class PaintEvent(wx.Frame):
  10     def __init__(self, parent, id, title):
  11         wx.Frame.__init__(self, parent, id, title)
  12
  13         self.Bind(wx.EVT_PAINT, self.OnPaint)
  14
  15         #------------
  16
  17         self.Centre()
  18
  19     #-----------------------------------------------------------------------
  20
  21     def OnPaint(self, event):
  22         wx.Bell()
  23
  24 #---------------------------------------------------------------------------
  25
  26 class MyApp(wx.App):
  27     def OnInit(self):
  28         pe = PaintEvent(None, -1, 'Paintevent.py')
  29         pe.Show(True)
  30
  31         return True
  32
  33 #---------------------------------------------------------------------------
  34
  35 app = MyApp(0)
  36 app.MainLoop()
When we press a key on our keyboard, wx.KeyEvent is generated. There are three different key handlers:
- EVT_KEY_DOWN
- EVT_KEY_UP
- EVT_CHAR
A common request is to close application, when Esc key is pressed.
   1 #!/usr/bin/python
   2
   3 # keyevent.py
   4
   5 import wx
   6
   7 #---------------------------------------------------------------------------
   8
   9 class KeyEvent(wx.Frame):
  10     def __init__(self, parent, id, title):
  11         wx.Frame.__init__(self, parent, id, title)
  12
  13         panel = wx.Panel(self, -1)
  14         panel.SetFocus()
  15         panel.Bind(wx.EVT_KEY_DOWN, self.OnKeyDown)
  16
  17         #------------
  18
  19         self.Centre()
  20
  21         #------------
  22
  23         self.Show(True)
  24
  25     #-----------------------------------------------------------------------
  26
  27     def OnKeyDown(self, event):
  28         keycode = event.GetKeyCode()
  29         if keycode == wx.WXK_ESCAPE:
  30             ret  = wx.MessageBox('Are you sure to quit?',
  31                                  'Question',
  32                                  wx.YES_NO | wx.CENTRE |
  33                                  wx.NO_DEFAULT,
  34                                  self)
  35             if ret == wx.YES:
  36                 self.Close()
  37         event.Skip()
  38
  39 #---------------------------------------------------------------------------
  40
  41 app = wx.App()
  42 KeyEvent(None, -1, 'Keyevent.py')
  43 app.MainLoop()
We find out, which key was pressed by calling GetKeyCode() method. In our case, keycode is wx.WXK_ESCAPE.
keycode = event.GetKeyCode()
Other keycodes are listed below.
Dialogs
In wxPython you can use predefined dialogs or create your own dialogs. You can also create dialog based applications.
The example shows a skeleton of a dialog based application in wxPython.
   1 #!/usr/bin/python
   2
   3 # simpledialog.py
   4
   5 import wx
   6
   7 #---------------------------------------------------------------------------
   8
   9 class MyDialog(wx.Dialog):
  10     def __init__(self, parent, id, title):
  11         wx.Dialog.__init__(self, parent, id, title)
  12
  13 #---------------------------------------------------------------------------
  14
  15 class MyApp(wx.App):
  16     def OnInit(self):
  17         dia = MyDialog(None, -1, "Simpledialog.py")
  18         dia.ShowModal()
  19         dia.Destroy()
  20
  21         return True
  22
  23 #---------------------------------------------------------------------------
  24
  25 app = MyApp(0)
  26 app.MainLoop()
Notice that you cannot resize the dialog window. The Destroy() method is necessary. It deletes the dialog from the memory. Otherwise, the script would not exit properly.
There are two types of dialogs. Modal and modeless. Modal dialog does not allow a user to work with the rest of the application until it is destroyed. Modal dialogs are created with the ShowModal() method. Dialogs are modeless when called with Show().
Custom dialogs
There are two methods that simplify the creation of dialogs. Both return a specific sizer object.
CreateTextSizer(self, string message)
CreateButtonSizer(self, long flags)
CreateTextSizer() method creates a text sizer. In the following example, we add some buttons into the sizer to demonstrate it.
   1 #!/usr/bin/python
   2
   3 # customdialog1.py
   4
   5 import wx
   6
   7 #---------------------------------------------------------------------------
   8
   9 class MyDialog(wx.Dialog):
  10     def __init__(self, parent, id, title):
  11         wx.Dialog.__init__(self, parent, id, title, size=(300, 250))
  12
  13         sizer = self.CreateTextSizer(' My Buttons :')
  14
  15         sizer.Add(wx.Button(self, -1, 'Button 1'), 0, wx.ALL, 5)
  16         sizer.Add(wx.Button(self, -1, 'Button 2'), 0, wx.ALL, 5)
  17         sizer.Add(wx.Button(self, -1, 'Button 3'), 0, wx.ALL, 5)
  18         sizer.Add(wx.Button(self, -1, 'Button 4'), 0, wx.ALL|wx.ALIGN_CENTER, 5)
  19         sizer.Add(wx.Button(self, -1, 'Button 5'), 0, wx.ALL|wx.EXPAND, 5)
  20
  21         self.SetSizer(sizer)
  22
  23 #---------------------------------------------------------------------------
  24
  25 class MyFrame(wx.Frame):
  26     def __init__(self, parent, id, title):
  27         wx.Frame.__init__(self, parent, id, title, size=(350, 300))
  28
  29         panel = wx.Panel(self, -1)
  30
  31         wx.Button(panel, 1, 'Show Custom Dialog', (100, 100))
  32
  33         self.Bind (wx.EVT_BUTTON, self.OnShowCustomDialog, id=1)
  34
  35     #-----------------------------------------------------------------------
  36
  37     def OnShowCustomDialog(self, event):
  38         dia = MyDialog(self, -1, 'buttons')
  39         dia.ShowModal()
  40         dia.Destroy()
  41
  42 #---------------------------------------------------------------------------
  43
  44 class MyApp(wx.App):
  45     def OnInit(self):
  46         frame = MyFrame(None, -1, 'Customdialog1.py')
  47         frame.Centre()
  48         frame.Show(True)
  49
  50         return True
  51
  52 #---------------------------------------------------------------------------
  53
  54 app = MyApp(0)
  55 app.MainLoop()
CreateButtonSizer() method creates a row of buttons. You can specify button types with different flags. CreateButtonSizer() method can take the following flags:
- wx.OK
- wx.CANCEL
- wx.YES
- wx.NO
- wx.HELP
- wx.NO_DEFAULT
   1 #!/usr/bin/python
   2
   3 # customdialog2.py
   4
   5 import wx
   6
   7 #---------------------------------------------------------------------------
   8
   9 class MyDialog(wx.Dialog):
  10     def __init__(self, parent, id, title):
  11         wx.Dialog.__init__(self, parent, id, title)
  12
  13         stline = wx.StaticText(self, -1, 'Discipline ist Macht.')
  14
  15         sizer =  self.CreateButtonSizer(wx.NO | wx.YES | wx.HELP)
  16
  17         #------------
  18
  19         vbox = wx.BoxSizer(wx.VERTICAL)
  20
  21         vbox.Add(stline, 1, wx.ALIGN_CENTER|wx.TOP, 45)
  22         vbox.Add(sizer, 0, wx.ALIGN_CENTER | wx.ALL, 10)
  23
  24         self.SetSizer(vbox)
  25
  26         #------------
  27
  28         self.Bind(wx.EVT_BUTTON, self.OnYes, id=wx.ID_YES)
  29
  30     #-----------------------------------------------------------------------
  31
  32     def OnYes(self, event):
  33         self.Destroy()
  34
  35 #---------------------------------------------------------------------------
  36
  37 class MyFrame(wx.Frame):
  38     def __init__(self, parent, id, title):
  39         wx.Frame.__init__(self, parent, id, title)
  40
  41         panel = wx.Panel(self, -1)
  42
  43         wx.Button(panel, 1, '&Show custom Dialog', (50, 50))
  44
  45         self.Bind(wx.EVT_BUTTON, self.OnShowCustomDialog, id=1)
  46
  47     #-----------------------------------------------------------------------
  48
  49     def OnShowCustomDialog(self, event):
  50         dia = MyDialog(self, -1, '')
  51         val = dia.ShowModal()
  52         dia.Destroy()
  53
  54 #---------------------------------------------------------------------------
  55
  56 class MyApp(wx.App):
  57     def OnInit(self):
  58         frame = MyFrame(None, -1, 'Customdialog2.py')
  59         frame.Centre()
  60         frame.Show(True)
  61
  62         return True
  63
  64 #---------------------------------------------------------------------------
  65
  66 app = MyApp(0)
  67 app.MainLoop()
Note that wxPython does not take the order of flags into account.
sizer = self.CreateButtonSizer(wxNO|wxYES|wxHELP)
The buttons will be created according to the standards.
Common Predefined Dialogs
wxPython provides several common dialogs. They save programmers a lot of work. They also help promote standards in applications. We will show these ones:
wx.MessageDialog
wx.ColourDialog
wx.FileDialog
wx.PageSetupDialog
wx.FontDialog
wx.DirDialog
wx.SingleChoiceDialog
wx.TextEntryDialog
   1 #!/usr/bin/python
   2
   3 # commondialogs.py
   4
   5 import wx
   6 import os, sys
   7
   8 #---------------------------------------------------------------------------
   9
  10 class MyFrame(wx.Frame):
  11     def __init__(self, parent, id, title):
  12         wx.Frame.__init__(self, parent, id, title)
  13
  14         self.CreateStatusBar()
  15
  16         #------------
  17
  18         menuBar = wx.MenuBar()
  19
  20         menu = wx.Menu()
  21         menu.Append(99,  "&Message Dialog", "Shows a Message Dialog")
  22         menu.Append(100, "&Color Dialog", "Shows a Color Dialog")
  23         menu.Append(101, "&File Dialog", "Shows a File Dialog")
  24         menu.Append(102, "&Page Setup Dialog", "Shows a Page Setup Dialog")
  25         menu.Append(103, "&Font Dialog", "Shows a Font Dialog")
  26         menu.Append(104, "&Directory Dialog", "Shows a Directory Dialog")
  27         menu.Append(105, "&SingleChoice Dialog", "Shows a SingleChoice Dialog")
  28         menu.Append(106, "&TextEntry Dialog", "Shows a TextEntry Dialog")
  29         menuBar.Append(menu, "&Dialogs")
  30
  31         self.SetMenuBar(menuBar)
  32
  33         #------------
  34
  35         self.Bind(wx.EVT_MENU, self.message, id=99)
  36         self.Bind(wx.EVT_MENU, self.choosecolor, id=100)
  37         self.Bind(wx.EVT_MENU, self.openfile, id=101)
  38         self.Bind(wx.EVT_MENU, self.pagesetup, id=102)
  39         self.Bind(wx.EVT_MENU, self.choosefont, id=103)
  40         self.Bind(wx.EVT_MENU, self.opendir, id=104)
  41         self.Bind(wx.EVT_MENU, self.singlechoice, id=105)
  42         self.Bind(wx.EVT_MENU, self.textentry, id=106)
  43
  44     #-----------------------------------------------------------------------
  45
  46     def message(self, event):
  47         dlg = wx.MessageDialog(self, 'To save one life is as if you have saved the world.', 'Talmud', wx.OK|wx.ICON_INFORMATION)
  48         dlg.ShowModal()
  49         dlg.Destroy()
  50
  51
  52     def choosecolor(self, event):
  53         dlg = wx.ColourDialog(self)
  54         dlg.GetColourData().SetChooseFull(True)
  55         if dlg.ShowModal() == wx.ID_OK:
  56             data = dlg.GetColourData()
  57             self.SetStatusText('You selected: %s\n' % str(data.GetColour().Get()))
  58         dlg.Destroy()
  59
  60
  61     def openfile(self, event):
  62         dlg = wx.FileDialog(self, "Choose a file", os.getcwd(), "", "*.*", wx.FD_OPEN)
  63         if dlg.ShowModal() == wx.ID_OK:
  64             path = dlg.GetPath()
  65             mypath = os.path.basename(path)
  66             self.SetStatusText("You selected: %s" % mypath)
  67         dlg.Destroy()
  68
  69
  70     def pagesetup(self, event):
  71         dlg = wx.PageSetupDialog(self)
  72         if dlg.ShowModal() == wx.ID_OK:
  73             data = dlg.GetPageSetupData()
  74             tl = data.GetMarginTopLeft()
  75             br = data.GetMarginBottomRight()
  76             self.SetStatusText('Margins are: %s %s' % (str(tl), str(br)))
  77         dlg.Destroy()
  78
  79
  80     def choosefont(self, event):
  81         default_font = wx.Font(10, wx.SWISS , wx.NORMAL, wx.NORMAL, False, "Verdana")
  82         data = wx.FontData()
  83         if sys.platform == 'win32':
  84             data.EnableEffects(True)
  85         data.SetAllowSymbols(False)
  86         data.SetInitialFont(default_font)
  87         data.SetRange(10, 30)
  88         dlg = wx.FontDialog(self, data)
  89         if dlg.ShowModal() == wx.ID_OK:
  90             data = dlg.GetFontData()
  91             font = data.GetChosenFont()
  92             color = data.GetColour()
  93             text = 'Face: %s, Size: %d, Color: %s' % (font.GetFaceName(), font.GetPointSize(),  color.Get())
  94             self.SetStatusText(text)
  95         dlg.Destroy()
  96
  97
  98     def opendir(self, event):
  99         dlg = wx.DirDialog(self, "Choose a directory:", style=wx.DD_DEFAULT_STYLE | wx.DD_NEW_DIR_BUTTON)
 100         if dlg.ShowModal() == wx.ID_OK:
 101             self.SetStatusText('You selected: %s\n' % dlg.GetPath())
 102         dlg.Destroy()
 103
 104
 105     def singlechoice(self, event):
 106         sins = ['Greed', 'Lust', 'Gluttony', 'Pride', 'Sloth', 'Envy', 'Wrath']
 107         dlg = wx.SingleChoiceDialog(self, 'Seven deadly sins', 'Which one?', sins, wx.CHOICEDLG_STYLE)
 108         if dlg.ShowModal() == wx.ID_OK:
 109             self.SetStatusText('You chose: %s\n' % dlg.GetStringSelection())
 110         dlg.Destroy()
 111
 112
 113     def textentry(self, event):
 114         dlg = wx.TextEntryDialog(self, 'Enter some text','Text Entry')
 115         dlg.SetValue("Default")
 116         if dlg.ShowModal() == wx.ID_OK:
 117             self.SetStatusText('You entered: %s\n' % dlg.GetValue())
 118         dlg.Destroy()
 119
 120 #---------------------------------------------------------------------------
 121
 122 class MyApp(wx.App):
 123     def OnInit(self):
 124         myframe = MyFrame(None, -1, "Commondialogs.py")
 125         myframe.CenterOnScreen()
 126         myframe.Show(True)
 127
 128         return True
 129
 130 #---------------------------------------------------------------------------
 131
 132 app = MyApp(0)
 133 app.MainLoop()
The script shows eight different common dialogs. All the output is displayed on the statusbar.
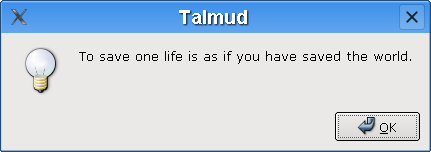
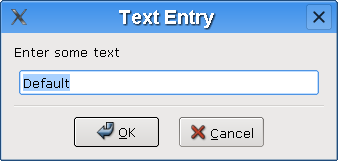
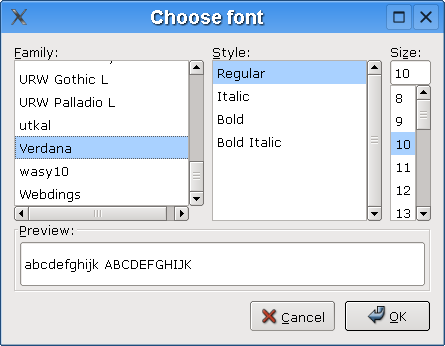
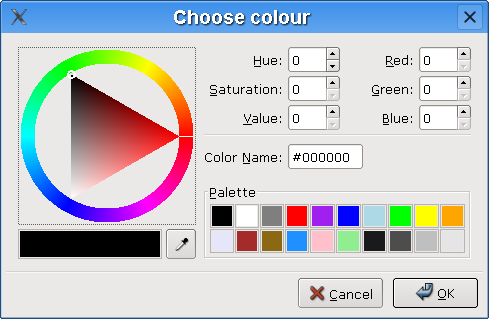
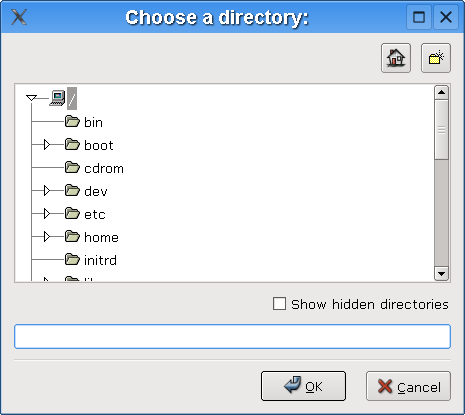
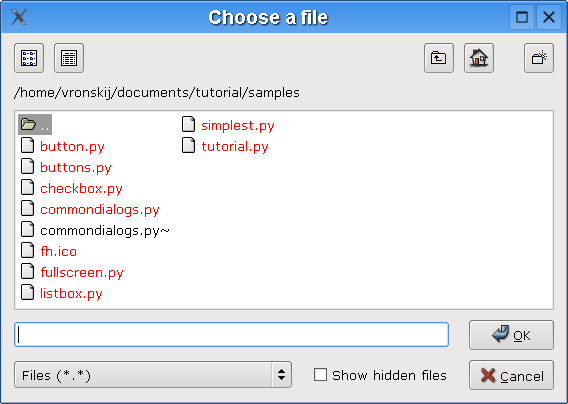
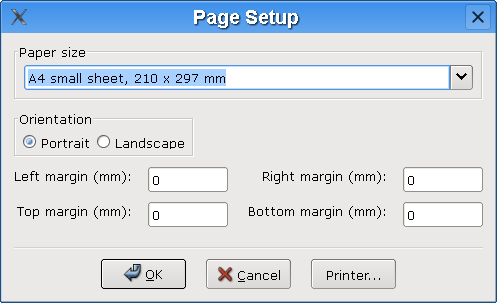
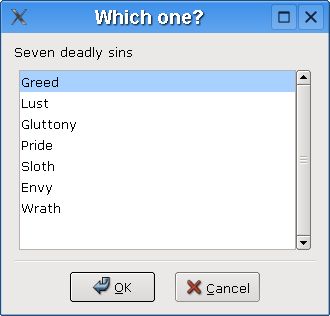
Figure: commondialogs.py
Core Widgets
In this section, we will introduce basic widgets in wxPython. Each widget will have a small code example.
wx.Button
link : https://wiki.wxpython.org/How%20to%20create%20a%20button%20%28Phoenix%29
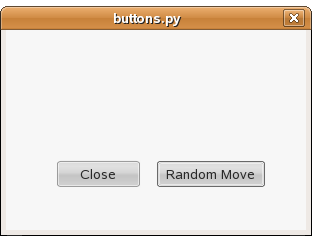
Figure: buttons.py
wx.ToggleButton
Link : https://wiki.wxpython.org/How%20to%20create%20a%20toggle%20button%20%28Phoenix%29
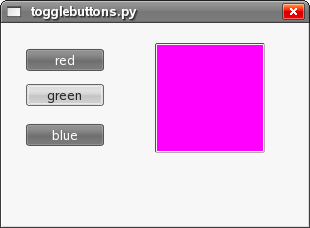
Figure: togglebuttons.py
wx.BitmapButton
Link : https://wiki.wxpython.org/How%20to%20create%20a%20bitmap%20button%20%28Phoenix%29
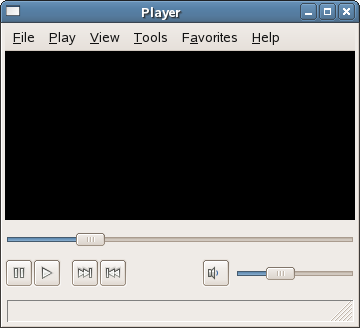
Figure: player.py
wx.StaticLine
Link : https://wiki.wxpython.org/How%20to%20create%20a%20static%20line%20%28Phoenix%29
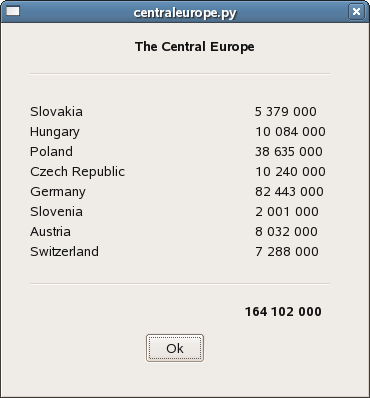
Figure: centraleurope.py
wx.StaticText
Link : https://wiki.wxpython.org/How%20to%20create%20a%20static%20text%20%28Phoenix%29
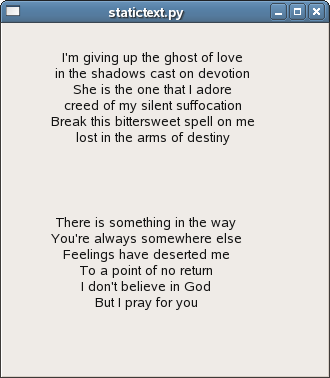
Figure: statictext.py
wx.StaticBox
Link : https://wiki.wxpython.org/How%20to%20create%20a%20static%20box%20%28Phoenix%29
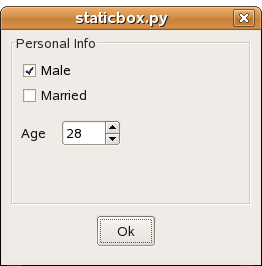
Figure: staticbox.py
wx.ComboBox
Link : https://wiki.wxpython.org/How%20to%20create%20a%20combo%20box%20%28Phoenix%29
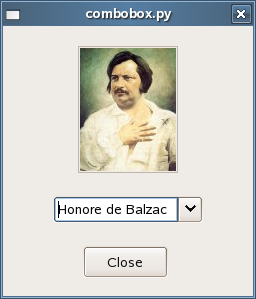
Figure: combobox.py
wx.CheckBox
Link : https://wiki.wxpython.org/How%20to%20create%20a%20check%20box%20%28Phoenix%29
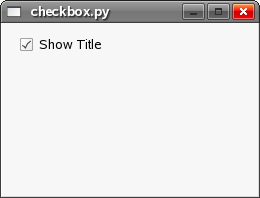
Figure: checkbox.py
wx.StatusBar
Link : https://wiki.wxpython.org/How%20to%20create%20a%20status%20bar%20%28Phoenix%29
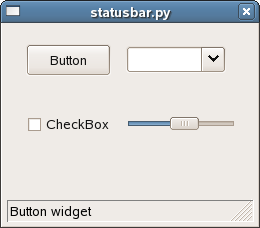
Figure: statusbar.py
wx.RadioButton
Link : https://wiki.wxpython.org/How%20to%20create%20a%20radio%20button%20%28Phoenix%29
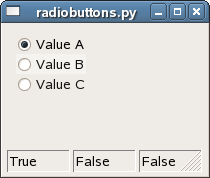
Figure: radiobuttons.py
wx.Gauge
Link : https://wiki.wxpython.org/How%20to%20create%20a%20gauge%20%28Phoenix%29
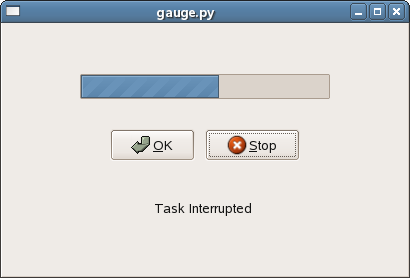
Figure: gauge.py
wx.Slider
Link : https://wiki.wxpython.org/How%20to%20create%20a%20slider%20%28Phoenix%29
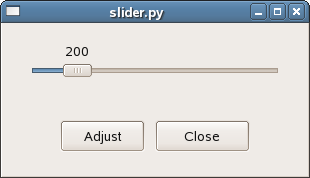
Figure: slider.py
wx.ListBox
Link : https://wiki.wxpython.org/How%20to%20create%20a%20list%20box%20%28Phoenix%29
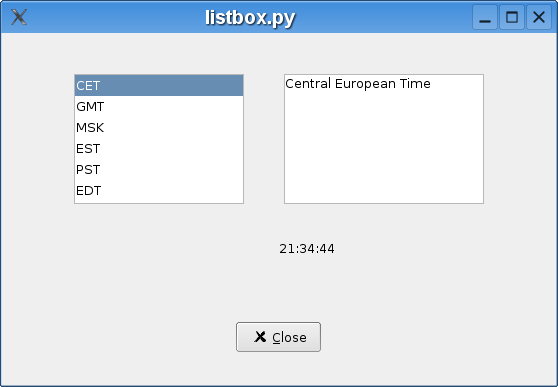
Figure: listbox.py
wx.SpinCtrl
Link : https://wiki.wxpython.org/How%20to%20create%20a%20spin%20control%20%28Phoenix%29
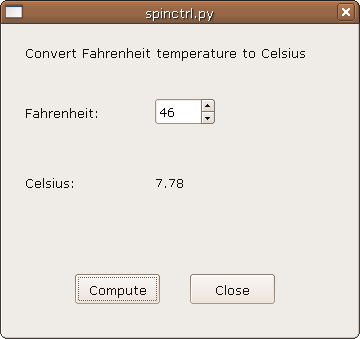
Figure: spinctrl.py
wx.ListCtrl
wx.ListCtrl creates lists in the following formats:
- report view
- list view
- icon view
In our example, we key in the states and their capitals and add them into the list widget. We use report view.
   1 #!/usr/bin/python
   2
   3 # capitals.py
   4
   5 import wx
   6
   7 #---------------------------------------------------------------------------
   8
   9 class MyDialog(wx.Dialog):
  10     def __init__(self, parent, id, title):
  11         wx.Dialog.__init__(self, parent, id, title,
  12                            size=(600, 500), style=wx.DEFAULT_DIALOG_STYLE)
  13
  14         pnl1 = wx.Panel(self, -1, style=wx.SIMPLE_BORDER)
  15         pnl2 = wx.Panel(self, -1, style=wx.SIMPLE_BORDER)
  16
  17         self.lc = wx.ListCtrl(self, -1, style=wx.LC_REPORT)
  18         self.lc.InsertColumn(0, 'State')
  19         self.lc.InsertColumn(1, 'Capital')
  20         self.lc.SetColumnWidth(0, 140)
  21         self.lc.SetColumnWidth(1, 153)
  22         self.lc.SetBackgroundColour("#eceade")
  23
  24         self.tc1 = wx.TextCtrl(pnl1, -1)
  25         self.tc2 = wx.TextCtrl(pnl1, -1)
  26
  27         #------------
  28
  29         hbox  = wx.BoxSizer(wx.HORIZONTAL)
  30         vbox1 = wx.BoxSizer(wx.VERTICAL)
  31         vbox2 = wx.BoxSizer(wx.VERTICAL)
  32         vbox3 = wx.GridSizer(2,2,0,0)
  33         vbox4 = wx.BoxSizer(wx.VERTICAL)
  34
  35         vbox1.Add(pnl1, 1, wx.EXPAND | wx.ALL, 3)
  36         vbox1.Add(pnl2, 1, wx.EXPAND | wx.ALL, 3)
  37
  38         vbox2.Add(self.lc, 1, wx.EXPAND | wx.ALL, 3)
  39
  40         vbox3.AddMany([ (wx.StaticText(pnl1, -1, 'State :'),0, wx.ALIGN_CENTER),
  41                         (self.tc1, 0, wx.ALIGN_LEFT|wx.ALIGN_CENTER_VERTICAL),
  42                         (wx.StaticText(pnl1, -1, 'Capital :'),0, wx.ALIGN_CENTER_HORIZONTAL),
  43                         (self.tc2,0)])
  44
  45         vbox4.Add(wx.Button(pnl2, 10, '&Add'),   0, wx.ALIGN_CENTER| wx.TOP, 45)
  46         vbox4.Add(wx.Button(pnl2, 11, '&Remove'), 0, wx.ALIGN_CENTER|wx.TOP, 15)
  47         vbox4.Add(wx.Button(pnl2, 12, '&Clear'), 0, wx.ALIGN_CENTER| wx.TOP, 15)
  48         vbox4.Add(wx.Button(pnl2, 13, '&Quit'), 0, wx.ALIGN_CENTER| wx.TOP, 15)
  49
  50         hbox.Add(vbox1, 1, wx.EXPAND)
  51         hbox.Add(vbox2, 1, wx.EXPAND)
  52
  53         pnl1.SetSizer(vbox3)
  54         pnl2.SetSizer(vbox4)
  55         self.SetSizer(hbox)
  56
  57         #------------
  58
  59         self.Bind (wx.EVT_BUTTON, self.OnAdd, id=10)
  60         self.Bind (wx.EVT_BUTTON, self.OnRemove, id=11)
  61         self.Bind (wx.EVT_BUTTON, self.OnClear, id=12)
  62         self.Bind (wx.EVT_BUTTON, self.OnClose, id=13)
  63
  64     #-----------------------------------------------------------------------
  65
  66     def OnAdd(self, event):
  67         if not self.tc1.GetValue() or not self.tc2.GetValue():
  68             return
  69         num_items = self.lc.GetItemCount()
  70         self.lc.InsertItem(num_items, self.tc1.GetValue())
  71         self.lc.SetItem(num_items, 1, self.tc2.GetValue())
  72         self.tc1.Clear()
  73         self.tc2.Clear()
  74
  75
  76     def OnRemove(self, event):
  77         index = self.lc.GetFocusedItem()
  78         self.lc.DeleteItem(index)
  79
  80
  81     def OnClose(self, event):
  82         self.Close()
  83
  84
  85     def OnClear(self, event):
  86         self.lc.DeleteAllItems()
  87
  88 #---------------------------------------------------------------------------
  89
  90 class MyApp(wx.App):
  91     def OnInit(self):
  92         dia = MyDialog(None, -1, 'Capitals.py')
  93         dia.ShowModal()
  94         dia.Destroy()
  95
  96         return True
  97
  98 #---------------------------------------------------------------------------
  99
 100 app = MyApp(0)
 101 app.MainLoop()
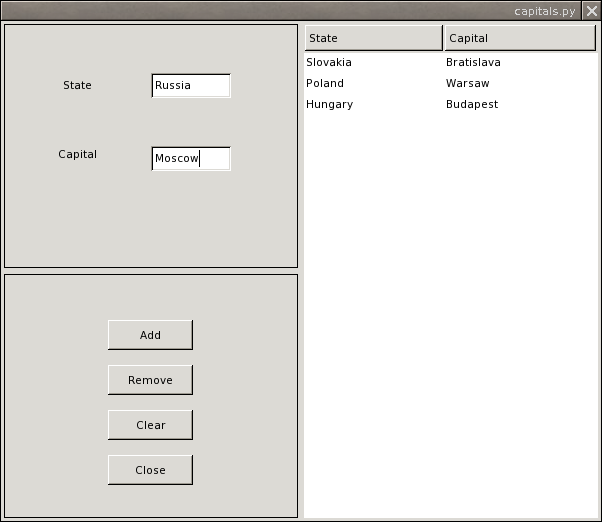
Figure: capitals.py
wx.SplitterWindow
This widget enables to split the main area of an application into parts. The user can dynamically resize those parts with the mouse pointer. Such a solution can be seen in mail clients (evolution) or in burning software (k3b). You can split an area vertically or horizontally.
   1 #!/usr/bin/python
   2
   3 # splitterwindow.py
   4
   5 import wx
   6
   7 #---------------------------------------------------------------------------
   8
   9 class MyFrame(wx.Frame):
  10     def __init__(self, parent, id, title):
  11         wx.Frame.__init__(self, parent, id, title,
  12                           wx.DefaultPosition, wx.Size(350, 300))
  13
  14         splitter = wx.SplitterWindow(self, -1)
  15         splitter.SetMinimumPaneSize(20)
  16
  17         panel1 = wx.Panel(splitter, -1)
  18         panel1.SetBackgroundColour(wx.LIGHT_GREY)
  19
  20         wx.StaticText(panel1, -1,
  21                       "Whether you think that you can, or that you can't, you are usually right."
  22                       "\n\n Henry Ford",
  23                       (100,100), style=wx.ALIGN_CENTRE)
  24
  25         panel2 = wx.Panel(splitter, -1)
  26         panel2.SetBackgroundColour(wx.YELLOW)
  27
  28         splitter.SplitVertically(panel1, panel2)
  29
  30         #------------
  31
  32         self.Centre()
  33
  34 #---------------------------------------------------------------------------
  35
  36 class MyApp(wx.App):
  37     def OnInit(self):
  38         frame = MyFrame(None, -1, 'Splitterwindow.py')
  39         frame.Show(True)
  40         self.SetTopWindow(frame)
  41
  42         return True
  43
  44 #---------------------------------------------------------------------------
  45
  46 app = MyApp(0)
  47 app.MainLoop()
wx.ScrolledWindow
Link : https://wiki.wxpython.org/How%20to%20create%20a%20scrolled%20window%20%28Phoenix%29
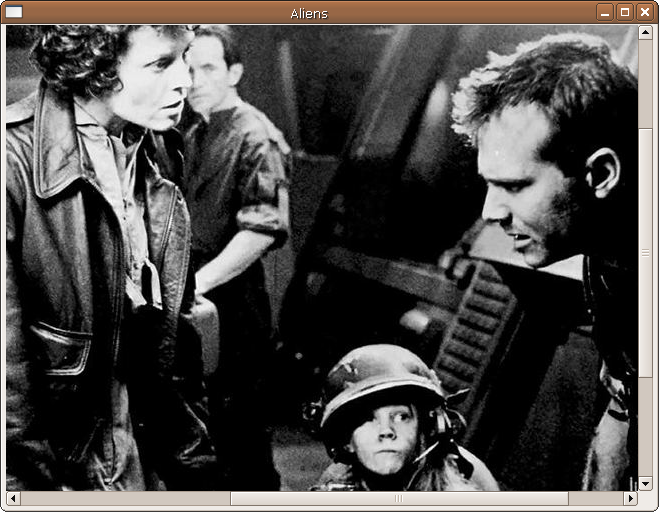
Figure: myscrolledwindow.py
wx.TreeCtrl
wx.TreeCtrl displays data in a hierarchy.
   1 #!/usr/bin/python
   2
   3 # treectrl.py
   4
   5 import wx
   6
   7 #---------------------------------------------------------------------------
   8
   9 class MyFrame(wx.Frame):
  10     def __init__(self, parent, id, title):
  11         wx.Frame.__init__(self, parent, id, title,
  12                           wx.DefaultPosition, wx.Size(450, 350))
  13
  14         panel1 = wx.Panel(self, -1)
  15         panel2 = wx.Panel(self, -1)
  16
  17         self.tree = wx.TreeCtrl(panel1, 1, wx.DefaultPosition, (-1,-1),
  18                                 wx.TR_HIDE_ROOT|wx.TR_HAS_BUTTONS)
  19
  20         root = self.tree.AddRoot('Programmer')
  21         os = self.tree.AppendItem(root, 'Operating Systems')
  22         pl = self.tree.AppendItem(root, 'Programming Languages')
  23         tk = self.tree.AppendItem(root, 'Toolkits')
  24
  25         self.tree.AppendItem(os, 'Linux')
  26         self.tree.AppendItem(os, 'FreeBSD')
  27         self.tree.AppendItem(os, 'OpenBSD')
  28         self.tree.AppendItem(os, 'NetBSD')
  29         self.tree.AppendItem(os, 'Solaris')
  30
  31         cl = self.tree.AppendItem(pl, 'Compiled languages')
  32         sl = self.tree.AppendItem(pl, 'Scripting languages')
  33
  34         self.tree.AppendItem(cl, 'Java')
  35         self.tree.AppendItem(cl, 'C++')
  36         self.tree.AppendItem(cl, 'C')
  37         self.tree.AppendItem(cl, 'Pascal')
  38         self.tree.AppendItem(sl, 'Python')
  39         self.tree.AppendItem(sl, 'Ruby')
  40         self.tree.AppendItem(sl, 'Tcl')
  41         self.tree.AppendItem(sl, 'PHP')
  42         self.tree.AppendItem(tk, 'Qt')
  43         self.tree.AppendItem(tk, 'MFC')
  44         self.tree.AppendItem(tk, 'wxPython')
  45         self.tree.AppendItem(tk, 'GTK+')
  46         self.tree.AppendItem(tk, 'Swing')
  47         self.tree.Bind(wx.EVT_TREE_SEL_CHANGED, self.OnSelChanged, id=1)
  48
  49         self.display = wx.StaticText(panel2, -1, '',(10, 10), style=wx.ALIGN_CENTRE)
  50
  51         #------------
  52
  53         hbox = wx.BoxSizer(wx.HORIZONTAL)
  54         vbox = wx.BoxSizer(wx.VERTICAL)
  55
  56         vbox.Add(self.tree, 1, wx.EXPAND)
  57
  58         hbox.Add(panel1, 1, wx.EXPAND)
  59         hbox.Add(panel2, 1, wx.EXPAND)
  60
  61         panel1.SetSizer(vbox)
  62         self.SetSizer(hbox)
  63
  64         #------------
  65
  66         self.Centre()
  67
  68     #-----------------------------------------------------------------------
  69
  70     def OnSelChanged(self, event):
  71         item =  event.GetItem()
  72         self.display.SetLabel(self.tree.GetItemText(item))
  73
  74 #---------------------------------------------------------------------------
  75
  76 class MyApp(wx.App):
  77     def OnInit(self):
  78         frame = MyFrame(None, -1, 'Treectrl.py')
  79         frame.Show(True)
  80         self.SetTopWindow(frame)
  81
  82         return True
  83
  84 #---------------------------------------------------------------------------
  85
  86 app = MyApp(0)
  87 app.MainLoop()
First of all we must create a root item.
root = self.tree.AddRoot('Programmer')In our case, root item will not be displayed, because we used wx.TR_HIDE_ROOT flag in our constructor.
self.tree = wx.TreeCtrl(panel1, 1, wx.DefaultPosition, (-1,-1), wx.TR_HIDE_ROOT|wx.TR_HAS_BUTTONS)
We add items to the root item withAppendItem() method.
os = self.tree.AppendItem(root, 'Operating Systems')
pl = self.tree.AppendItem(root, 'Programming Languages')
tk = self.tree.AppendItem(root, 'Toolkits')
We can similarly create several levels by simply adding items to existing items.
We catch events with wx.EVT_TREE_SEL_CHANGED() event handler.
wx.EVT_TREE_SEL_CHANGED(self.tree, 1, self.OnSelChanged)
Various constructor style flags:
- TR_NO_BUTTONS
- TR_HAS_BUTTONS
- TR_NO_LINES
- TR_LINES_AT_ROOT
- TR_SINGLE
- TR_MULTIPLE
- TR_EXTENDED
- TR_HAS_VARIABLE_ROW_HEIGHT
- TR_EDIT_LABELS
- TR_HIDE_ROOT
- TR_ROW_LINES
- TR_FULL_ROW_HIGHLIGHT
- TR_DEFAULT_STYLE
- TR_TWIST_BUTTONS
- TR_MAC_BUTTONS
- TR_AQUA_BUTTONS
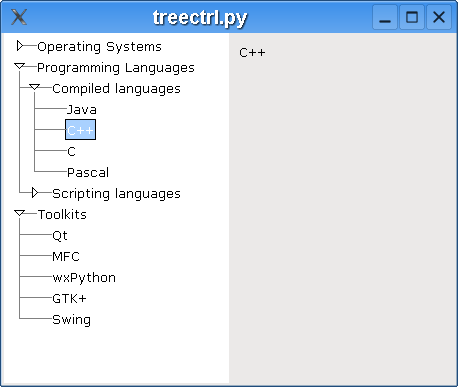
Figure: treectrl.py
wx.Notebook
Link : https://wiki.wxpython.org/How%20to%20create%20a%20notebook%20%28Phoenix%29
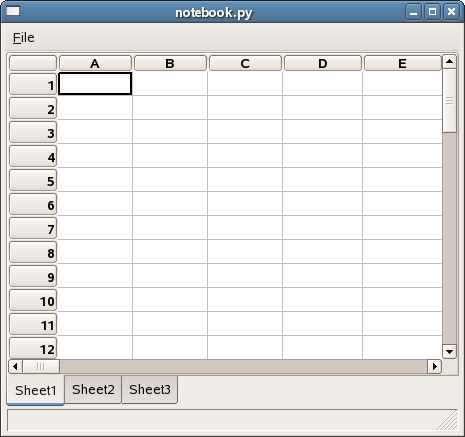
Figure: notebook.py
wx.lib Classes
Mouse Gestures
We can find mouse gestures in such successfull applications like Firefox or Opera. They really help users save their time while browsing on the Interent. Mouse gestures are created with
wx.lib.gestures.MouseGestures class in wxPython.
Possible methods |
|
AddGesture(string gesture, action) |
registers a mouse gesture |
RemoveGesture(string gesture) |
removes a mouse gesture |
SetGesturePen(wx.Colour colour, integer width) |
sets the colour and width of the line drawn to visually represent each gesture |
SetGesturesVisible(boolean vis) |
sets wether a line is drawn to visually represent each gesture |
SetWobbleTolerance(integer wobbletolerance) |
sets the intensity to trigger a gesture |
SetModifiers(list modifiers) |
takes a list of wx.Key constants (Control, Shift, and/or Alt) |
SetMouseButton(integer flag) |
takes the wx constant for the target mousebutton |
Available gestures:
- L for left
- R for right
- U for up
- D for down
- 7 for northwest
- 9 for northeast
- 1 for southwest
- 3 for southeast
If you wonder why these numbers were chosen, have a look at the numerical pad. Mouse gestures can be combined. This way 'RDLU' is a mouse gesture triggered, when we do a square with a mouse pointer.
Possible flags are:
- wx.MOUSE_BTN_LEFT
- wx.MOUSE_BTN_MIDDLE
- wx.MOUSE_BTN_RIGHT
   1 #!/usr/bin/python
   2
   3 # mousegestures.py
   4
   5 import wx
   6 import wx.lib.gestures as gest
   7
   8 #---------------------------------------------------------------------------
   9
  10 class MyMouseGestures(wx.Frame):
  11     def __init__ (self, parent, id, title):
  12         wx.Frame.__init__(self, parent, id, title, size=(600, 500))
  13
  14         panel = wx.Panel(self, -1)
  15
  16         mg = gest.MouseGestures(panel, True, wx.MOUSE_BTN_LEFT)
  17         mg.SetGesturePen(wx.Colour(255, 0, 0), 2)
  18         mg.SetGesturesVisible(True)
  19         mg.AddGesture('DR', self.OnDownRight)
  20
  21     #-----------------------------------------------------------------------
  22
  23     def OnDownRight(self):
  24           self.Close()
  25
  26 #---------------------------------------------------------------------------
  27
  28 class MyApp(wx.App):
  29     def OnInit(self):
  30         frame = MyMouseGestures(None, -1, "Mousegestures.py")
  31         frame.Show(True)
  32         frame.Centre()
  33
  34         return True
  35
  36 #---------------------------------------------------------------------------
  37
  38 app = MyApp(0)
  39 app.MainLoop()
In our example, we have registered a mouse gesture for a panel. Mouse gesture is triggered, when a left button is pressed and we go down and right with a cursor. As in letter 'L'. Our mouse gesture will close the application. If we want to use mouse gestures, we have to create a
MouseGesture object. The first parameter is a window, where the mouse gesture is registered. Second parameter defines a way to register a gesture. True is for automatic, False for manual. Manual is not fully implemented and we are happy with the automatic way. Last parameter defines a mouse button, which will be pressed when triggering gestures. The button can be later changed with the SetMouseButton() method.
mg = gest.MouseGestures(panel, True, wx.MOUSE_BTN_LEFT)
Our gestures will be painted as red lines. They will be 2 pixels wide.
mg.SetGesturePen(wx.Colour(255, 0, 0), 2)
We set this gesture visible with theSetGesturesVisible() method.
mg.SetGesturesVisible(True)
We register a mouse gesture with theAddGesture() method. The first parameter is the gesture. Second parameter is the method triggered by the gesture.
mg.AddGesture('DR', self.OnDownRight)
AnalogClockWindow
Simple analog clock.
   1 #!/usr/bin/python
   2
   3 # analogclock.py
   4
   5 import wx
   6 from wx.lib import analogclock as ac
   7
   8 #---------------------------------------------------------------------------
   9
  10 class MyFrame(wx.Frame):
  11     def __init__(self, parent, id, title):
  12         wx.Frame.__init__(self, parent, id, title)
  13
  14         #------------
  15
  16         if wx.Platform == "__WXMSW__":
  17             self.SetDoubleBuffered(True)
  18
  19         #------------
  20
  21         clock = ac.AnalogClockWindow(self)
  22         clock.SetBackgroundColour('gray')
  23         clock.SetHandColours('black')
  24         clock.SetTickColours('WHITE')
  25         clock.SetTickSizes(h=5, m=2)
  26         clock.SetTickStyles(ac.TICKS_ROMAN)
  27
  28         #------------
  29
  30         self.SetSize((400,350))
  31
  32 #---------------------------------------------------------------------------
  33
  34 class MyApp(wx.App):
  35     def OnInit(self):
  36         frame = MyFrame(None, -1, 'Analogclock.py')
  37         frame.Centre()
  38         frame.Show(True)
  39
  40         return True
  41
  42 #---------------------------------------------------------------------------
  43
  44 app = MyApp(0)
  45 app.MainLoop()
Various clock styles:
SetClockStyle()
- SHOW_QUARTERS_TICKS
- SHOW_HOURS_TICKS
- SHOW_MINUTES_TICKS
- SHOW_HOURS_HAND
- SHOW_MINUTES_HAND
- SHOW_SECONDS_HAND
- SHOW_SHADOWS
- ROTATE_TICKS
- OVERLAP_TICKS
Various ticks styles:
SetTickStyles()
- TICKS_NONE
- TICKS_SQUARE
- TICKS_CIRCLE
- TICKS_POLY
- TICKS_DECIMAL
- TICKS_ROMAN
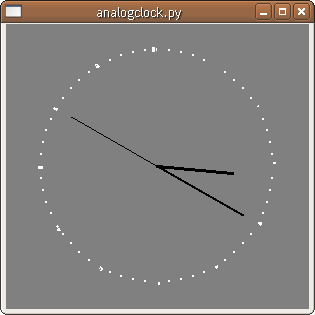
Figure: analogclock.py
Bitmap Text Buttons
Link : https://wiki.wxpython.org/How%20to%20create%20a%20gen%20bitmap%20text%20button%20%28Phoenix%29
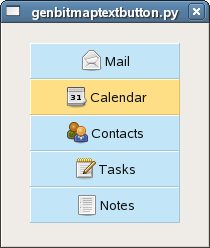
Figure: genbitmaptextbutton.py
Advanced Widgets
In this section we will discuss some advanced widgets. They are found in lib subdirectory which is in wx directory. These widgets are written in python. They address needs not covered by the underlying C++ wx library.
CalendarCtrl
CalendarCtrl is a handy widget for working with dates.
   1 #!/usr/bin/python
   2
   3 # calendar.py
   4
   5 import wx
   6 import wx.adv
   7 from wx.adv import CalendarCtrl, GenericCalendarCtrl, CalendarDateAttr
   8
   9 #---------------------------------------------------------------------------
  10
  11 class Calendar(wx.Dialog):
  12     def __init__(self, parent, id, title):
  13         wx.Dialog.__init__(self, parent, id, title)
  14
  15         # calend = CalendarCtrl(self, -1, wx.DateTime().Today(),
  16         #                       style=wx.adv.CAL_SHOW_HOLIDAYS |
  17         #                             wx.adv.CAL_SEQUENTIAL_MONTH_SELECTION)
  18         # Or
  19         #
  20         calend = GenericCalendarCtrl(self, -1, wx.DateTime().Today(),
  21                                      style=wx.adv.CAL_SHOW_HOLIDAYS |
  22                                            wx.adv.CAL_SUNDAY_FIRST |
  23                                            wx.adv.CAL_SEQUENTIAL_MONTH_SELECTION)
  24
  25         #------------
  26
  27         self.text = wx.StaticText(self, -1, '&Date')
  28         btn = wx.Button(self, -1, '&Ok')
  29
  30         #------------
  31
  32         vbox = wx.BoxSizer(wx.VERTICAL)
  33         hbox = wx.BoxSizer(wx.HORIZONTAL)
  34         hbox2 = wx.BoxSizer(wx.HORIZONTAL)
  35
  36         hbox.Add(self.text)
  37
  38         hbox2.Add(btn, 1)
  39
  40         vbox.Add(calend, 0, wx.EXPAND | wx.ALL, 20)
  41         vbox.Add((-1, 20))
  42         vbox.Add(hbox, 0,  wx.LEFT, 8)
  43         vbox.Add(hbox2, 0, wx.ALIGN_CENTER | wx.TOP | wx.BOTTOM, 20)
  44
  45         self.SetSizerAndFit(vbox)
  46
  47         #------------
  48
  49         self.Bind(wx.adv.EVT_CALENDAR, self.OnCalSelected, id=calend.GetId())
  50         self.Bind(wx.EVT_BUTTON, self.OnQuit, id=btn.GetId())
  51         self.Bind(wx.EVT_CLOSE, self.OnQuit)
  52
  53         #------------
  54
  55         self.Centre()
  56
  57         #------------
  58
  59         self.Show(True)
  60
  61     #-----------------------------------------------------------------------
  62
  63     def OnCalSelected(self, event):
  64         date = event.GetDate()
  65         dt = str(date).split(' ')
  66         s = ' '.join(str(s) for s in dt)
  67         self.text.SetLabel(s)
  68
  69
  70     def OnQuit(self, event):
  71         self.Destroy()
  72
  73 #---------------------------------------------------------------------------
  74
  75 app = wx.App()
  76 Calendar(None, -1, 'Calendar.py')
  77 app.MainLoop()
Possible calendar styles:
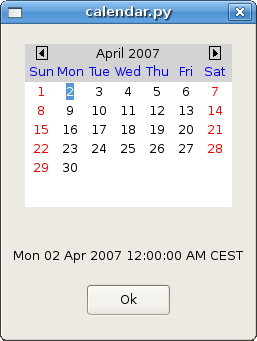
Figure: calendar.py
LEDNumberCtrl
In the previous example we had an analog clock example.LEDNumberCtrl widget displays a digital clock.
In our example we show current local time in a simple wx.Frame.
   1 #!/usr/bin/python
   2
   3 # lednumber.py
   4
   5 import time
   6 import wx
   7 import wx.gizmos as gizmos
   8
   9 #---------------------------------------------------------------------------
  10
  11 class MyFrame(wx.Frame):
  12     def __init__(self, parent, id, title):
  13         wx.Frame.__init__(self, parent, id, title,
  14                           wx.DefaultPosition, wx.Size(450, 100))
  15
  16         #------------
  17
  18         if wx.Platform == "__WXMSW__":
  19             self.SetDoubleBuffered(True)
  20
  21         #------------
  22
  23         self.led = gizmos.LEDNumberCtrl(self, -1, wx.DefaultPosition,
  24                                         wx.DefaultSize, gizmos.LED_ALIGN_CENTER)
  25
  26         self.OnTimer(None)
  27         self.timer = wx.Timer(self, -1)
  28         self.timer.Start(1000)
  29         self.Bind(wx.EVT_TIMER, self.OnTimer)
  30
  31         #------------
  32
  33         self.Centre()
  34
  35     #-----------------------------------------------------------------------
  36
  37     def OnTimer(self, event):
  38         t = time.localtime(time.time())
  39         st = time.strftime("%I:%M:%S", t)
  40         self.led.SetValue(st)
  41
  42 #---------------------------------------------------------------------------
  43
  44 class MyApp(wx.App):
  45     def OnInit(self):
  46         frame = MyFrame(None, -1, 'Lednumber.py')
  47         frame.Show(True)
  48         self.SetTopWindow(frame)
  49
  50         return True
  51
  52 #---------------------------------------------------------------------------
  53
  54 app = MyApp(0)
  55 app.MainLoop()
Possible flags:
- LED_ALIGN_LEFT
- LED_ALIGN_RIGHT
- LED_ALIGN_CENTER
- LED_ALIGN_MASK
- LED_DRAW_FADED
Windows users, putwx.CallAfter() in your code:
self.led = gizmos.LEDNumberCtrl(self, -1, style=gizmos.LED_ALIGN_CENTER)
wx.CallAfter(self.OnTimer, None)
self.timer = wx.Timer(self, -1)

Figure: lednumber.py
Creating a taskbar application
Link : https://wiki.wxpython.org/How%20to%20create%20a%20task%20bar%20icon%20%28Phoenix%29
![]()
Figure: mytaskbaricon.py
wx.TheClipboard
From wikipedia:
In computing, the clipboard is a portion of memory where information that has been copied or cut from a computer application is stored. This storage is meant as a short-term volatile place to keep information that will be used again shortly.
wx.TheClipboard is a class for manipulating clipboard in wxPython. Fist we must call the Open() method to get ownership of the clipboard. If successful, the method returns true. Then we put data on the clipboard with the
SetData() method. This method accepts a simple data object.
We have three predefined simple data objects:
wx.FileDataObject
wx.TextDataObject
wx.BitmapDataObject
To retrieve data from Clipboard you call methodGetData(). It accepts simple data object as well. In the end we close the clipboard with Close() method and relinquish ownership of it.
clipboard.py example shows a simple usage of the the clipboard in wxPython.
   1 #!/usr/bin/python
   2
   3 # clipboard.py
   4
   5 import wx
   6
   7 #---------------------------------------------------------------------------
   8
   9 class MyFrame(wx.Frame):
  10     def __init__(self, parent, id, title):
  11         wx.Frame.__init__(self, parent, id, title,
  12                           wx.DefaultPosition, wx.Size(320, 300))
  13
  14         panel1 = wx.Panel(self, -1)
  15
  16         self.tc1 = wx.TextCtrl(panel1, -1, '', (50,50), (85, -1))
  17         self.tc2 = wx.TextCtrl(panel1, -1, '', (180,50), (85, -1))
  18
  19         wx.Button(panel1, 1, '&Copy', (50,200))
  20         wx.Button(panel1, 2, '&Paste', (180,200))
  21
  22         #------------
  23
  24         self.Bind(wx.EVT_BUTTON, self.OnCopy, id=1)
  25         self.Bind(wx.EVT_BUTTON, self.OnPaste, id=2)
  26
  27         #------------
  28
  29         self.Centre()
  30
  31     #-----------------------------------------------------------------------
  32
  33     def OnCopy(self, event):
  34         text = self.tc1.GetValue()
  35         if wx.TheClipboard.Open():
  36             wx.TheClipboard.Clear()
  37             wx.TheClipboard.SetData(wx.TextDataObject(text))
  38             wx.TheClipboard.Close()
  39
  40
  41     def OnPaste(self, event):
  42         if wx.TheClipboard.Open():
  43             td = wx.TextDataObject()
  44             success = wx.TheClipboard.GetData(td)
  45             wx.TheClipboard.Close()
  46             if not success: return
  47             text = td.GetText()
  48             if text: self.tc2.SetValue(text)
  49
  50 #---------------------------------------------------------------------------
  51
  52 class MyApp(wx.App):
  53     def OnInit(self):
  54         frame = MyFrame(None, -1, 'Clipboard.py')
  55         frame.Show(True)
  56         self.SetTopWindow(frame)
  57
  58         return True
  59
  60 #---------------------------------------------------------------------------
  61
  62 app = MyApp(0)
  63 app.MainLoop()
We have two textcontrols and two buttons. We input some text into the first textcontrol and paste in the the second one with our two buttons. Notice how we retrieve data from thewxTextDataObject:
text = td.GetText()
Drag and Drop
Wikipedia:
In computer graphical user interfaces, drag-and-drop is the action of (or support for the action of) clicking on a virtual object and dragging it to a different location or onto another virtual object. In general, it can be used to invoke many kinds of actions, or create various types of associations between two abstract objects. I think everyone is familiar with drag
& drop. Here is an example in wxPython:
   1 #!/usr/bin/python
   2
   3 # dragdrop.py
   4
   5 import os
   6 import wx
   7
   8 #---------------------------------------------------------------------------
   9
  10 class MyTextDropTarget(wx.TextDropTarget):
  11     def __init__(self, object):
  12         wx.TextDropTarget.__init__(self)
  13
  14         self.object = object
  15
  16     #-----------------------------------------------------------------------
  17
  18     def OnDropText(self, x, y, data):
  19         self.object.InsertItem(0, data)
  20
  21         return True
  22
  23 #---------------------------------------------------------------------------
  24
  25 class MyFrame(wx.Frame):
  26     def __init__(self, parent, id, title):
  27         wx.Frame.__init__(self, parent, id, title,
  28                           wx.DefaultPosition, wx.Size(600, 450))
  29
  30         splitter1 = wx.SplitterWindow(self, -1, style=wx.SP_3D)
  31         splitter1.SetMinimumPaneSize(20)
  32
  33         splitter2 = wx.SplitterWindow(splitter1, -1, style=wx.SP_3D)
  34         splitter2.SetMinimumPaneSize(20)
  35
  36         #------------
  37
  38         if wx.Platform == "__WXGTK__":
  39             self.dir = wx.GenericDirCtrl(splitter1, -1, dir='/home/', style=wx.DIRCTRL_DIR_ONLY)
  40
  41         elif wx.Platform == "__WXMSW__":
  42             self.dir = wx.GenericDirCtrl(splitter1, -1, dir='C:/', style=wx.DIRCTRL_DIR_ONLY)
  43
  44         #------------
  45
  46         self.lc1 = wx.ListCtrl(splitter2, -1, style=wx.LC_LIST)
  47         self.lc2 = wx.ListCtrl(splitter2, -1, style=wx.LC_LIST)
  48
  49         #------------
  50
  51         dt = MyTextDropTarget(self.lc2)
  52         self.lc2.SetDropTarget(dt)
  53
  54         #------------
  55
  56         tree = self.dir.GetTreeCtrl()
  57
  58         #------------
  59
  60         splitter2.SplitHorizontally(self.lc1, self.lc2)
  61         splitter1.SplitVertically(self.dir, splitter2)
  62
  63         #------------
  64
  65         self.Bind(wx.EVT_LIST_BEGIN_DRAG, self.OnDragInit, id=self.lc1.GetId())
  66         self.Bind(wx.EVT_TREE_SEL_CHANGED, self.OnSelect, id=tree.GetId())
  67
  68         #------------
  69
  70         self.OnSelect(0)
  71
  72         #------------
  73
  74         self.Centre()
  75
  76     #-----------------------------------------------------------------------
  77
  78     def OnSelect(self, event):
  79         list = os.listdir(self.dir.GetPath())
  80         print("List dir :", list)
  81         self.lc1.ClearAll()
  82         self.lc2.ClearAll()
  83
  84         for i in range(len(list)):
  85             if list[i][0] != '.':
  86                 self.lc1.InsertItem(0, list[i])
  87
  88
  89     def OnDragInit(self, event):
  90         text = self.lc1.GetItemText(event.GetIndex())
  91         tdo = wx.TextDataObject(text)
  92         tds = wx.DropSource(self.lc1)
  93         tds.SetData(tdo)
  94         tds.DoDragDrop(True)
  95
  96 #---------------------------------------------------------------------------
  97
  98 class MyApp(wx.App):
  99     def OnInit(self):
 100         frame = MyFrame(None, -1, "Dragdrop.py")
 101         frame.Show(True)
 102         self.SetTopWindow(frame)
 103
 104         return True
 105
 106 #---------------------------------------------------------------------------
 107
 108 app = MyApp(0)
 109 app.MainLoop()
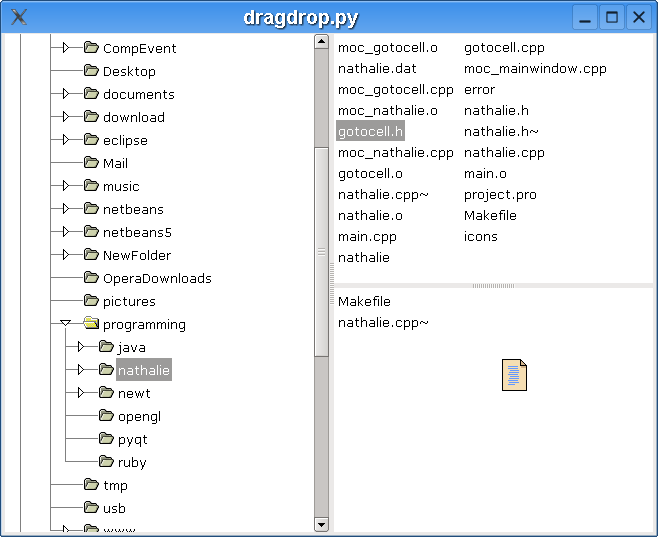
Figure: dragdrop.py
One of the advantages of the GUI over the console is its intuitiveness. You can learn a GUI program easier than a console application. You often do not need a manual. On the other hand, some graphical operations are too complex. For example, deleting a file by dragging it and droping it to the trash basket is very intuitive and easy to understand, but actually most people just press the delete key. (shift + delete) It is more effective. In our next example we explore a graphical operation, that is very handy. In most GUI text editors, you can open a file by simply dragging it from the file manager and dropping it on the editor.
   1 #!/usr/bin/python
   2
   3 # filedrop.py
   4
   5 import wx
   6
   7 #---------------------------------------------------------------------------
   8
   9 class FileDrop(wx.FileDropTarget):
  10     def __init__(self, window):
  11         wx.FileDropTarget.__init__(self)
  12
  13         self.window = window
  14
  15     #-----------------------------------------------------------------------
  16
  17     def OnDropFiles(self, x, y, filenames):
  18         for name in filenames:
  19             try:
  20                 file = open(name, 'r', encoding='utf-8')
  21                 text = file.read()
  22                 self.window.WriteText(text)
  23                 file.close()
  24             except IOError as error:
  25                 dlg = wx.MessageDialog(None, 'Error opening file\n' + str(error))
  26                 dlg.ShowModal()
  27             except UnicodeDecodeError as error:
  28                 dlg = wx.MessageDialog(None, 'Cannot open non ascii files\n' + str(error))
  29                 dlg.ShowModal()
  30
  31         return True
  32
  33 #---------------------------------------------------------------------------
  34
  35 class MyFrame(wx.Frame):
  36     def __init__(self, parent, id, title):
  37         wx.Frame.__init__(self, parent, id, title,
  38                           wx.DefaultPosition, wx.Size(450, 400))
  39
  40         self.text = wx.TextCtrl(self, -1, style = wx.TE_MULTILINE)
  41         dt = FileDrop(self.text)
  42         self.text.SetDropTarget(dt)
  43
  44         self.Centre()
  45
  46 #---------------------------------------------------------------------------
  47
  48 class MyApp(wx.App):
  49     def OnInit(self):
  50         frame = MyFrame(None, -1, '')
  51         frame.Show(True)
  52         self.SetTopWindow(frame)
  53
  54         return True
  55
  56 #---------------------------------------------------------------------------
  57
  58 app = MyApp(0)
  59 app.MainLoop()
Plotting
Link : https://wiki.wxpython.org/How%20to%20use%20Plot%20-%20Part%203%20(Phoenix)
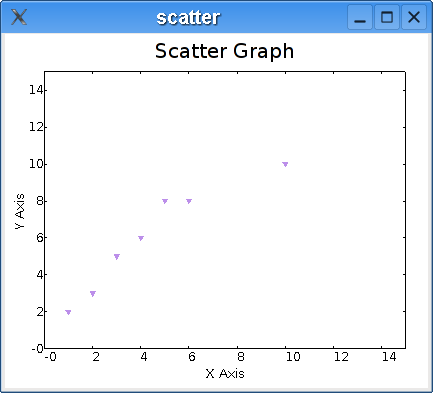
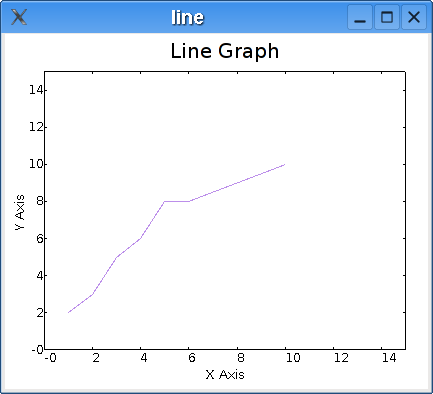
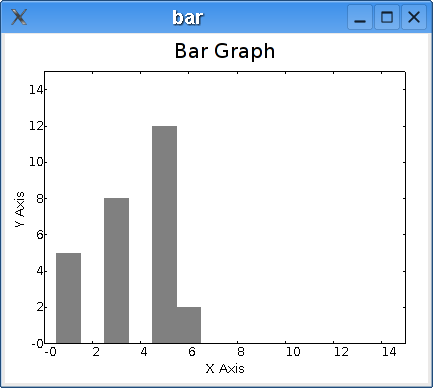
Figures: scatter, line, bar graphs
Configuring application settings
Many applications allow users to configure their settings. Users can toggle tooltips on and of, change fonts, default download paths etc. Mostly they have a menu option called preferences. Application settings are saved to the hard disk, so that users do not have to change the settings each time the application starts.
In wxPython we have wx.Config class to do our job.
On Linux, settings are stored in a simple hidden file. This file is located in the home user directory by default. The location of the configuration file can be changed. The name of the file is specified in the constructor of the wx.Config class.
Various wx.Config methods |
|
string Read(string key, string defaultVal='') |
return a string value of a key if it exists, defaultVal otherwise |
int ReadInt(string key, int defaultVal=0) |
return an integer value of the key if it exists, defaultVal otherwise |
float ReadFloat(string key, float defaultVal=0.0) |
return a float value of a key if it exists, defaultVal otherwise |
bool ReadBool(string key, bool defaultVal=False) |
return a boolean value of a key if it exists, defaultVal otherwise |
bool Write(string key, string value) |
write a string value, return True on success |
bool WriteInt(string key, int value) |
write an integer value, return True on success |
bool WriteFloat(string key, float value) |
write a float value, return True on success |
bool WriteBool(string key, bool value) |
write a boolean value, return True on success |
bool Exists(string value) |
return True if a key with a given name exists |
In the following code example, we can cofigure the size of the window. If there is no configuration file, the height and the width of the window is set to the defaul 250 px value. We can set these values to a range from 200 - 500px. After we save our values and restart the application, the window size is set to our preffered values.
   1 #!/usr/bin/python
   2
   3 # myconfig.py
   4
   5 import wx
   6
   7 #---------------------------------------------------------------------------
   8
   9 class MyFrame(wx.Frame):
  10     def __init__(self, parent, id, title):
  11
  12         self.cfg = wx.Config('myconfig')
  13
  14         if self.cfg.Exists('width'):
  15             w, h = self.cfg.ReadInt('width'), self.cfg.ReadInt('height')
  16         else:
  17             (w, h) = (250, 250)
  18
  19         wx.Frame.__init__(self, parent, id, title, wx.DefaultPosition, wx.Size(w, h))
  20
  21         #------------
  22
  23         wx.StaticText(self, -1, 'Width :', (20, 20))
  24         wx.StaticText(self, -1, 'Height :', (20, 70))
  25
  26         self.sc1 = wx.SpinCtrl(self, -1, str(w), (80, 15), (60, -1), min=200, max=500)
  27         self.sc2 = wx.SpinCtrl(self, -1, str(h), (80, 65), (60, -1), min=200, max=500)
  28
  29         wx.Button(self, 1, '&Save', (20, 120))
  30
  31         #------------
  32
  33         self.Bind(wx.EVT_BUTTON, self.OnSave, id=1)
  34
  35         #------------
  36
  37         self.statusbar = self.CreateStatusBar()
  38
  39         #------------
  40
  41         self.Centre()
  42
  43     #-----------------------------------------------------------------------
  44
  45     def OnSave(self, event):
  46         self.cfg.WriteInt("width", self.sc1.GetValue())
  47         self.cfg.WriteInt("height", self.sc2.GetValue())
  48         self.statusbar.SetStatusText('Configuration saved, %s ' % wx.Now())
  49
  50 #---------------------------------------------------------------------------
  51
  52 class MyApp(wx.App):
  53     def OnInit(self):
  54         frame = MyFrame(None, -1, 'Myconfig.py')
  55         frame.Show(True)
  56         self.SetTopWindow(frame)
  57
  58         return True
  59
  60 #---------------------------------------------------------------------------
  61
  62 app = MyApp(0)
  63 app.MainLoop()
Here we have the contents of a configuration file to our code example . It consists of two key, value pairs.
$ cat .myconfig
height=220
width=340
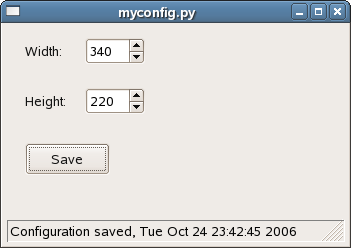
Figure: myconfig.py
wxPython functions
wxPython provides several useful functions. We can implement them easily in our programs. Technically, these functions are module functions. e.g defined in a module scope. They resemble what we know as static methods in C++ or Java.
System functions
System functions |
|
wx.Bell() |
beep a sound |
wx.GetDisplaySize() |
return the current display mode |
wx.GetEmailAddress() |
return user's email address |
wx.GetFullHostName() |
return full host name |
wx.GetHomeDir() |
return the user's home direstory |
wx.GetOsVersion() |
return Os version |
wx.GetOsDescription() |
return a full Os description |
wx.GetFreeMemory() |
not working |
wx.GetMousePosition() |
return mouse position |
wx.GetProcessId() |
return a process id of our application |
wx.GetUserName() |
returns a user's name |
wx.GetUTCTime() |
return number of seconds |
wx.Now() |
return current timestamp |
wx.Shell(string command) |
execute a command in a shell |
Dialog functions
These functions create dialogs. They do some common tasks.
Dialog functions |
|
wx.GetTextFromUser() |
get a text from user |
wx.DirSelector() |
select a directory |
wx.FileSelector() |
select a file |
wx.GetNumberFromUser() |
get a long number from user |
wx.GetSingleChoice() |
something |
wx.GetSingleChoiceIndex() |
something |
wx.GetSingleChoiceIndex() |
something |
wx.LoadFileSelector() |
load a file |
wx.MessageBox() |
show a message dialog |
wx.SaveFileSelector() |
saves a file |
string wx.GetTextFromUser(string message, string caption='', string default_value='', wx.Window parent=None)
string wx.DirSelector(string message=wx.DirSelectorPromptStr, string defaultPath='', style=wx.DD_DEFAULT_STYLE,
                      wx.Point pos=wx.DefaultPosition, wx.Window parent=None)
string wx.FileSelector(string message=wx.FileSelectorPromptStr, string default_path='', string default_filename='',
                       string default_extension='', string wildcard=wx.FileSelectorDefaultWildcardStr,
                       integer flags=0, wx.Window parent=None, integer x=-1, integer y=-1)
long wx.GetNumberFromUser(string message, string prompt, string caption, long value, long min=0, long max=100,
                          wx.Window parent=None, wx.Point pos=wx.DefaultPosition)
string wx.GetSingleChoice(string message, string caption, integer choices, string choices_array,
                          wx.Window parent=None, integer x=-1, integer y=-1, bool centre=True, integer width=150,
                          integer height=200)
integer wx.GetSingleChoiceIndex(string message, string caption, integer choices, string choices_array,
                                wx.Window parent=None, integer x=-1, integer y=-1, bool centre=True,
                                integer width=150, integer height=200)
string wx.LoadFileSelector(string what, string extension, string default_name='', wx.Window parent=None)
integer wx.MessageBox(string message, string caption='', style=wx.OK | wx.CENTRE, wx.Window parent=None,
                      integer x=-1, integer y=-1)
string wx.SaveFileSelector(string what, string extension, string default_name='', wx.Window parent=None)
Other functions
Here is a list of various other functions
Other functions |
|
wx.Exit() |
exit application |
bool wx.Yield() |
yield to other applications or messages |
bool wx.YieldIfNeeded() |
something |
bool SafeYield(wx.Window window=None, bool onlyIfNeeded=False) |
something |
wx.WakeUpIdle() |
empty the message queue |
wx.PostEvent(wx.EvtHandler dest, wx.Event event) |
wx.EventHandler to be processed later |
PyApp wx.GetApp() |
return a reference to the current wx.App object |
wx.SetDefaultPyEncoding(string encoding) |
set the current encoding for working with wx.String |
string wx.GetDefaultPyEncoding() |
get the current encoding for working with wx.String |
Using xml resource files
The idea behind xml resources is to separate the interface from the code of an application. Several GUI builders use this concept for creating interfaces. For example the famous Glade.
In our example we create a simple frame window with one button. We load resources from a file, load a panel and bind an event to a button.
   1 #!/usr/bin/python
   2
   3 # xml.py
   4
   5 import  wx
   6 import  wx.xrc  as  xrc
   7
   8 #---------------------------------------------------------------------------
   9
  10 class Xml(wx.Frame):
  11     def __init__(self, parent, id, title):
  12         wx.Frame.__init__(self, parent, id, title)
  13
  14         res = xrc.XmlResource('resource.xrc')
  15         res.LoadPanel(self, 'MyPanel')
  16
  17         self.Bind(wx.EVT_BUTTON, self.OnClose,  id=xrc.XRCID('CloseButton'))
  18
  19         #------------
  20
  21         self.Center()
  22
  23         #------------
  24
  25         self.Show(True)
  26
  27     #-----------------------------------------------------------------------
  28
  29     def OnClose(self, event):
  30         self.Close()
  31
  32 #---------------------------------------------------------------------------
  33
  34 app = wx.App()
  35 Xml(None, -1, 'xml.py')
  36 app.MainLoop()
This is resource file "resource.xrc". It is a xml file, where we define our widgets and their patterns. In this file, we use tags like<object></object>, <item></item> etc.
<?xml version="1.0" ?>
<resource>
  <object class="wxPanel" name="MyPanel">
   <object class="wxButton" name="CloseButton">
    <label>Close</label>
    <pos>150,100</pos>
   </object>
  </object>
</resource>
We use these two calls for working with widgets:
- XRCID(resource_name) - gives us the id of a button or menu item
- XRCCTRL(resource_name) - gives us the handlers of our widgets defined in resource file
Skeletons
In this section, we will create some application skeletons. Our scripts will work out the interface but will not implement the functionality. The goal is to show, how several well known GUI interfaces could be done in wxPython. Most manuals, tutorials and books show only the basic usage of a widget. When I was a beginner, I always wondered how this or this could be done. And I think, many newbies think the same.
File Hunter
File Hunter is a skeleton of a file manager. It copies the lookout of the Krusader, the best file manager available on Unix systems.
   1 #!/usr/bin/python
   2
   3 # filemanager.py
   4
   5 """
   6 ZetCode wxPython tutorial
   7
   8 This program creates a skeleton
   9 of a file manager UI.
  10
  11 author: Jan Bodnar
  12 website: zetcode.com
  13 last edited: May 2018
  14 """
  15
  16 import wx
  17 import os
  18 import time
  19
  20 ID_BUTTON=100
  21 ID_EXIT=200
  22 ID_SPLITTER=300
  23
  24 #---------------------------------------------------------------------------
  25
  26 class MyListCtrl(wx.ListCtrl):
  27     def __init__(self, parent):
  28         wx.ListCtrl.__init__(self, parent, style=wx.LC_REPORT)
  29
  30         images = ['images/empty.png', 'images/folder.png', 'images/source-py.png',
  31                   'images/image.png', 'images/pdf.png', 'images/up16.png']
  32
  33         self.InsertColumn(0, 'Name')
  34         self.InsertColumn(1, 'Ext')
  35         self.InsertColumn(2, 'Size', wx.LIST_FORMAT_RIGHT)
  36         self.InsertColumn(3, 'Modified')
  37
  38         self.SetColumnWidth(0, 120)
  39         self.SetColumnWidth(1, 35)
  40         self.SetColumnWidth(2, 60)
  41         self.SetColumnWidth(3, 420)
  42
  43         self.il = wx.ImageList(16, 16)
  44
  45         for i in images:
  46
  47             self.il.Add(wx.Bitmap(i))
  48
  49         self.SetImageList(self.il, wx.IMAGE_LIST_SMALL)
  50
  51         j = 1
  52
  53         self.InsertItem(0, '..')
  54         self.SetItemImage(0, 5)
  55
  56         #------------
  57
  58         files = os.listdir('.')
  59
  60         for i in files:
  61             (name, ext) = os.path.splitext(i)
  62             ex = ext[1:]
  63             size = os.path.getsize(i)
  64             sec = os.path.getmtime(i)
  65
  66             self.InsertItem(j, name)
  67             self.SetItem(j, 1, ex)
  68             self.SetItem(j, 2, str(size) + ' B')
  69             self.SetItem(j, 3, time.strftime('%Y-%m-%d %H:%M', time.localtime(sec)))
  70
  71             if os.path.isdir(i):
  72                 self.SetItemImage(j, 1)
  73             elif ex == 'py':
  74                 self.SetItemImage(j, 2)
  75             elif ex == 'jpg':
  76                 self.SetItemImage(j, 3)
  77             elif ex == 'pdf':
  78                 self.SetItemImage(j, 4)
  79             else:
  80                 self.SetItemImage(j, 0)
  81
  82             if (j % 2) == 0:
  83
  84                 self.SetItemBackgroundColour(j, '#e6f1f5')
  85
  86             j = j + 1
  87
  88 #---------------------------------------------------------------------------
  89
  90 class Example(wx.Frame):
  91     def __init__(self, *args, **kw):
  92         super(Example, self).__init__(*args, **kw)
  93
  94         self.InitUI()
  95
  96     #-----------------------------------------------------------------------
  97
  98     def InitUI(self):
  99         self.SetTitle("File Hunter")
 100         self.SetMinSize((760, 360))
 101
 102         #------------
 103
 104         self.splitter = wx.SplitterWindow(self, ID_SPLITTER, style=wx.SP_BORDER)
 105         self.splitter.SetMinimumPaneSize(50)
 106
 107         p1 = MyListCtrl(self.splitter)
 108         p2 = MyListCtrl(self.splitter)
 109
 110         self.splitter.SplitVertically(p1, p2)
 111
 112         #------------
 113
 114         filemenu= wx.Menu()
 115         filemenu.Append(ID_EXIT, "E&xit"," Terminate the program")
 116         editmenu = wx.Menu()
 117         netmenu = wx.Menu()
 118         showmenu = wx.Menu()
 119         configmenu = wx.Menu()
 120         helpmenu = wx.Menu()
 121
 122         menuBar = wx.MenuBar()
 123         menuBar.Append(filemenu, "&File")
 124         menuBar.Append(editmenu, "&Edit")
 125         menuBar.Append(netmenu, "&Net")
 126         menuBar.Append(showmenu, "&Show")
 127         menuBar.Append(configmenu, "&Config")
 128         menuBar.Append(helpmenu, "&Help")
 129         self.SetMenuBar(menuBar)
 130
 131         #------------
 132
 133         tb = self.CreateToolBar( wx.TB_HORIZONTAL | wx.NO_BORDER |
 134                       wx.TB_FLAT)
 135
 136         tb.AddTool(10, 'Previous', wx.Bitmap('images/previous.png'), shortHelp='Previous')
 137         tb.AddTool(20, 'Up', wx.Bitmap('images/up.png'), shortHelp='Up one directory')
 138         tb.AddTool(30, 'Home', wx.Bitmap('images/home.png'), shortHelp='Home')
 139         tb.AddTool(40, 'Refresh', wx.Bitmap('images/refresh.png'), shortHelp='Refresh')
 140         tb.AddSeparator()
 141         tb.AddTool(50, 'Edit text', wx.Bitmap('images/textedit.png'), shortHelp='Edit text')
 142         tb.AddTool(60, 'Terminal', wx.Bitmap('images/terminal.png'), shortHelp='Terminal')
 143         tb.AddSeparator()
 144         tb.AddTool(70, 'Help', wx.Bitmap('images/help.png'), shortHelp='Show help')
 145         tb.Realize()
 146
 147         #------------
 148
 149         button1 = wx.Button(self, ID_BUTTON + 1, "F3 View")
 150         button2 = wx.Button(self, ID_BUTTON + 2, "F4 Edit")
 151         button3 = wx.Button(self, ID_BUTTON + 3, "F5 Copy")
 152         button4 = wx.Button(self, ID_BUTTON + 4, "F6 Move")
 153         button5 = wx.Button(self, ID_BUTTON + 5, "F7 Mkdir")
 154         button6 = wx.Button(self, ID_BUTTON + 6, "F8 Delete")
 155         button7 = wx.Button(self, ID_BUTTON + 7, "F9 Rename")
 156         button8 = wx.Button(self, ID_EXIT, "F10 Quit")
 157
 158         #------------
 159
 160         self.sizer2 = wx.BoxSizer(wx.HORIZONTAL)
 161         self.sizer = wx.BoxSizer(wx.VERTICAL)
 162
 163         self.sizer2.Add(button1, 1, wx.EXPAND)
 164         self.sizer2.Add(button2, 1, wx.EXPAND)
 165         self.sizer2.Add(button3, 1, wx.EXPAND)
 166         self.sizer2.Add(button4, 1, wx.EXPAND)
 167         self.sizer2.Add(button5, 1, wx.EXPAND)
 168         self.sizer2.Add(button6, 1, wx.EXPAND)
 169         self.sizer2.Add(button7, 1, wx.EXPAND)
 170         self.sizer2.Add(button8, 1, wx.EXPAND)
 171
 172         self.sizer.Add(self.splitter,1,wx.EXPAND)
 173         self.sizer.Add(self.sizer2,0,wx.EXPAND)
 174
 175         self.SetSizer(self.sizer)
 176
 177         # size = wx.DisplaySize()
 178         # self.SetSize(size)
 179
 180         #------------
 181
 182         self.Bind(wx.EVT_SIZE, self.OnSize)
 183         self.Bind(wx.EVT_SPLITTER_DCLICK, self.OnDoubleClick, id=ID_SPLITTER)
 184         self.Bind(wx.EVT_MENU, self.OnExit, id=ID_EXIT)
 185         self.Bind(wx.EVT_BUTTON, self.OnExit, id=ID_EXIT)
 186
 187         #------------
 188
 189         sb = self.CreateStatusBar()
 190         sb.SetStatusText(os.getcwd())
 191
 192         #------------
 193
 194         self.Center()
 195
 196
 197     def OnExit(self, event):
 198         self.Close(True)
 199
 200
 201     def OnSize(self, event):
 202         size = self.GetSize()
 203         self.splitter.SetSashPosition(int(size.x / 2))
 204
 205         event.Skip()
 206
 207
 208     def OnDoubleClick(self, event):
 209         size = self.GetSize()
 210         self.splitter.SetSashPosition(int(size.x / 2))
 211
 212 #---------------------------------------------------------------------------
 213
 214 def main():
 215
 216     app = wx.App()
 217     ex = Example(None)
 218     ex.Show()
 219     app.MainLoop()
 220
 221 #---------------------------------------------------------------------------
 222
 223 if __name__ == '__main__':
 224     main()
If you double click on the splitter widget, it will divide the File Hunter into two parts with the same width. The same happens, if you resize the main window.
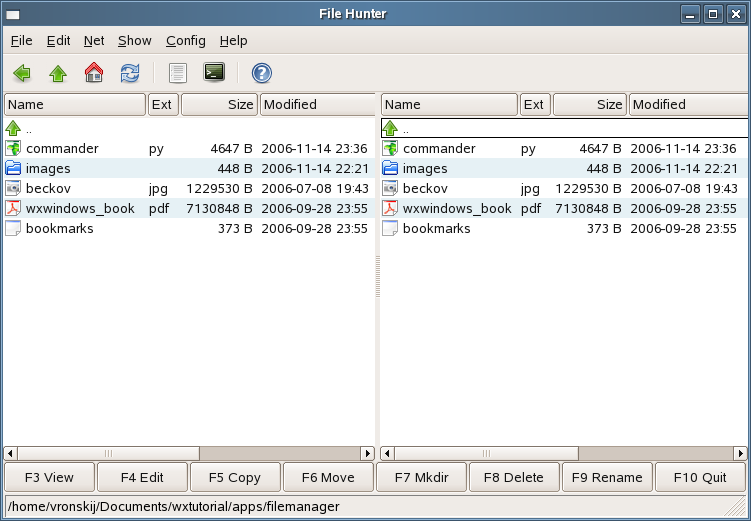
Figure: filemanager.py
SpreadSheet
Gnumeric, KSpread andOpenOffice Calc are famous spreadsheet applications available on Unix. The following example shows a skeleton of a spreadsheet application in wxPython.
   1 #!/usr/bin/python
   2
   3 # spreadsheet.py
   4
   5
   6 """
   7 ZetCode wxPython tutorial
   8
   9 This program creates a SpreadSheet UI.
  10
  11 author: Jan Bodnar
  12 website: zetcode.com
  13 last edited: May 2018
  14 """
  15
  16 from wx.lib import sheet
  17 import wx
  18
  19 #---------------------------------------------------------------------------
  20
  21 class MySheet(wx.grid.Grid):
  22     def __init__(self, *args, **kw):
  23         super(MySheet, self).__init__(*args, **kw)
  24
  25         self.InitUI()
  26
  27     #-----------------------------------------------------------------------
  28
  29     def InitUI(self):
  30         nOfRows = 55
  31         nOfCols = 25
  32
  33         self.row = self.col = 0
  34         self.CreateGrid(nOfRows, nOfCols)
  35
  36         self.SetColLabelSize(20)
  37         self.SetRowLabelSize(50)
  38
  39         self.Bind(wx.grid.EVT_GRID_SELECT_CELL, self.OnGridSelectCell)
  40
  41         for i in range(nOfRows):
  42             self.SetRowSize(i, 20)
  43
  44         for i in range(nOfCols):
  45             self.SetColSize(i, 75)
  46
  47
  48     def OnGridSelectCell(self, e):
  49         self.row, self.col = e.GetRow(), e.GetCol()
  50
  51         control = self.GetParent().GetParent().position
  52         value =  self.GetColLabelValue(self.col) + self.GetRowLabelValue(self.row)
  53         control.SetValue(value)
  54
  55         e.Skip()
  56
  57 #---------------------------------------------------------------------------
  58
  59 class Example(wx.Frame):
  60     def __init__(self, *args, **kw):
  61         super(Example, self).__init__(*args, **kw)
  62
  63         self.InitUI()
  64
  65     #-----------------------------------------------------------------------
  66
  67     def InitUI(self):
  68         fonts = ['Times New Roman', 'Times', 'Courier', 'Courier New', 'Helvetica',
  69                 'Sans', 'verdana', 'utkal', 'aakar', 'Arial']
  70         font_sizes = ['10', '11', '12', '14', '16']
  71
  72         #------------
  73
  74         menuBar = wx.MenuBar()
  75
  76         menu1 = wx.Menu()
  77         menuBar.Append(menu1, '&File')
  78         menu2 = wx.Menu()
  79         menuBar.Append(menu2, '&Edit')
  80         menu3 = wx.Menu()
  81         menuBar.Append(menu3, '&Edit')
  82         menu4 = wx.Menu()
  83         menuBar.Append(menu4, '&Insert')
  84         menu5 = wx.Menu()
  85         menuBar.Append(menu5, 'F&ormat')
  86         menu6 = wx.Menu()
  87         menuBar.Append(menu6, '&Tools')
  88         menu7 = wx.Menu()
  89         menuBar.Append(menu7, '&Data')
  90         menu8 = wx.Menu()
  91         menuBar.Append(menu8, '&Help')
  92
  93         self.SetMenuBar(menuBar)
  94
  95         #------------
  96
  97         toolbar1 = wx.ToolBar(self, style= wx.TB_HORIZONTAL)
  98
  99         toolbar1.AddTool(wx.ID_ANY, '', wx.Bitmap('images/new.png'))
 100         toolbar1.AddTool(wx.ID_ANY, '', wx.Bitmap('images/open.png'))
 101         toolbar1.AddTool(wx.ID_ANY, '', wx.Bitmap('images/save.png'))
 102
 103         toolbar1.AddSeparator()
 104
 105         toolbar1.AddTool(wx.ID_ANY, '', wx.Bitmap('images/cut.png'))
 106         toolbar1.AddTool(wx.ID_ANY, '', wx.Bitmap('images/copy.png'))
 107         toolbar1.AddTool(wx.ID_ANY, '', wx.Bitmap('images/paste.png'))
 108         toolbar1.AddTool(wx.ID_ANY, '',  wx.Bitmap('images/delete.png'))
 109
 110         toolbar1.AddSeparator()
 111
 112         toolbar1.AddTool(wx.ID_ANY, '', wx.Bitmap('images/undo.png'))
 113         toolbar1.AddTool(wx.ID_ANY, '', wx.Bitmap('images/redo.png'))
 114
 115         toolbar1.AddSeparator()
 116
 117         toolbar1.AddTool(wx.ID_ANY, '', wx.Bitmap('images/asc.png'))
 118         toolbar1.AddTool(wx.ID_ANY, '', wx.Bitmap('images/desc.png'))
 119
 120         toolbar1.AddSeparator()
 121         toolbar1.AddTool(wx.ID_ANY, '', wx.Bitmap('images/chart.png'))
 122
 123         toolbar1.AddSeparator()
 124         toolbar1.AddTool(wx.ID_ANY, '',  wx.Bitmap('images/exit.png'))
 125
 126         toolbar1.Realize()
 127
 128         toolbar2 = wx.ToolBar(self, wx.TB_HORIZONTAL | wx.TB_TEXT)
 129
 130         self.position = wx.TextCtrl(toolbar2)
 131
 132         font = wx.ComboBox(toolbar2, value='Times', choices=fonts, size=(100, -1),
 133                 style=wx.CB_DROPDOWN)
 134
 135         font_height = wx.ComboBox(toolbar2, value='10', choices=font_sizes,
 136                 size=(50, -1), style=wx.CB_DROPDOWN)
 137
 138         toolbar2.AddControl(self.position)
 139         toolbar2.AddControl(font)
 140         toolbar2.AddControl(font_height)
 141
 142         toolbar2.AddSeparator()
 143
 144         toolbar2.AddCheckTool(wx.ID_ANY, '', wx.Bitmap('images/text-bold.png'))
 145         toolbar2.AddCheckTool(wx.ID_ANY, '', wx.Bitmap('images/text-italic.png'))
 146         toolbar2.AddCheckTool(wx.ID_ANY, '', wx.Bitmap('images/text-underline.png'))
 147
 148         toolbar2.AddSeparator()
 149
 150         toolbar2.AddTool(wx.ID_ANY, '', wx.Bitmap('images/align-left.png'))
 151         toolbar2.AddTool(wx.ID_ANY, '', wx.Bitmap('images/align-center.png'))
 152         toolbar2.AddTool(wx.ID_ANY, '', wx.Bitmap('images/align-right.png'))
 153
 154         toolbar2.Realize()
 155
 156         #------------
 157
 158         notebook = wx.Notebook(self, style=wx.RIGHT)
 159
 160         sheet1 = MySheet(notebook)
 161         sheet2 = MySheet(notebook)
 162         sheet3 = MySheet(notebook)
 163         sheet1.SetFocus()
 164
 165         notebook.AddPage(sheet1, 'Sheet1')
 166         notebook.AddPage(sheet2, 'Sheet2')
 167         notebook.AddPage(sheet3, 'Sheet3')
 168
 169         #------------
 170
 171         box = wx.BoxSizer(wx.VERTICAL)
 172
 173         box.Add(toolbar1, border=5)
 174         box.Add((5,5) , 0)
 175         box.Add(toolbar2)
 176         box.Add((5,10) , 0)
 177         box.Add(notebook, 1, wx.EXPAND)
 178
 179         self.SetSizer(box)
 180
 181         #------------
 182
 183         self.CreateStatusBar()
 184
 185         #------------
 186
 187         self.SetSize((550, 550))
 188         self.SetTitle("SpreadSheet")
 189
 190         #------------
 191
 192         self.Centre()
 193
 194 #---------------------------------------------------------------------------
 195
 196 def main():
 197
 198     app = wx.App()
 199     ex = Example(None)
 200     ex.Show()
 201     app.MainLoop()
 202
 203 #---------------------------------------------------------------------------
 204
 205 if __name__ == '__main__':
 206     main()
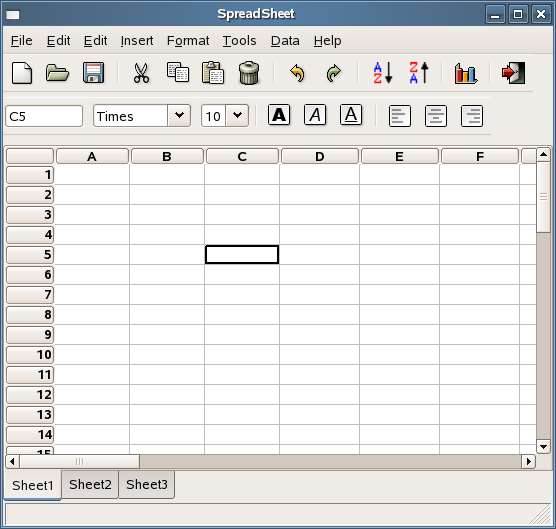
Figure: spreadsheet.py
Tips And Tricks
In this section we will show some tips in wxPython.
PopupMenu
The following code was committed by Chris Barker on the wxPython-users mailing list. Popup menu is here implemented in a separate class. This way, you don't have to manually check, if the events were already bound.
   1 #!/usr/bin/env python
   2
   3 # popup.py
   4
   5 import wx
   6
   7 app = wx.App()
   8
   9 #---------------------------------------------------------------------------
  10
  11 class MyPopupMenu(wx.Menu):
  12     def __init__(self, WinName):
  13         wx.Menu.__init__(self)
  14
  15         self.WinName = WinName
  16
  17         #------------
  18
  19         item1 = wx.MenuItem(self, -1, "Item One")
  20         self.Append(item1)
  21
  22         item2 = wx.MenuItem(self, -1,"Item Two")
  23         self.Append(item2)
  24
  25         item3 = wx.MenuItem(self, -1,"Item Three")
  26         self.Append(item3)
  27
  28         #------------
  29
  30         self.Bind(wx.EVT_MENU, self.OnItem1, item1)
  31         self.Bind(wx.EVT_MENU, self.OnItem2, item2)
  32         self.Bind(wx.EVT_MENU, self.OnItem3, item3)
  33
  34     #-----------------------------------------------------------------------
  35
  36     def OnItem1(self, event):
  37         print("Item One selected in the %s window" % self.WinName)
  38
  39
  40     def OnItem2(self, event):
  41         print("Item Two selected in the %s window" % self.WinName)
  42
  43
  44     def OnItem3(self, event):
  45         print("Item Three selected in the %s window" % self.WinName)
  46
  47 #---------------------------------------------------------------------------
  48
  49 class MyWindow(wx.Window):
  50     def __init__(self, parent, color):
  51         wx.Window.__init__(self, parent, -1)
  52
  53         self.color = color
  54
  55         self.SetBackgroundColour(color)
  56
  57         self.Bind(wx.EVT_RIGHT_DOWN, self.OnRightDown)
  58
  59     #-----------------------------------------------------------------------
  60
  61     def OnRightDown(self,event):
  62         self.PopupMenu(MyPopupMenu(self.color), event.GetPosition())
  63
  64 #---------------------------------------------------------------------------
  65
  66 class MyFrame(wx.Frame):
  67     def __init__(self):
  68         wx.Frame.__init__(self,None, -1, "Popup.py", size=(300, 200))
  69
  70         sizer = wx.GridSizer(2,2,5,5)
  71         sizer.Add(MyWindow(self,"blue"),1,wx.GROW)
  72         sizer.Add(MyWindow(self,"yellow"),1,wx.GROW)
  73         sizer.Add(MyWindow(self,"red"),1,wx.GROW)
  74         sizer.Add(MyWindow(self,"green"),1,wx.GROW)
  75         self.SetSizer(sizer)
  76
  77         self.Show()
  78
  79 #---------------------------------------------------------------------------
  80
  81 frame = MyFrame()
  82 app.SetTopWindow(frame)
  83 app.MainLoop()
The example is just a single frame. This frame is divided into four windows. If you right click on the frame, context menu pops up. Context menu consists of three commands. If you select any of them a message is sent to the console. It will say what item you selected plus the color of the window where you clicked with the mouse. This example shows the power of the object oriented programming. Imagine you would have to do it the other way, by calculating manually the position of the pointer!
Notice that the popup menu is implemented as a new class. This is a more elegant way of using popup menus as the following one, taken from the Demo application.
 def OnRightClick(self, event):
        # only do this part the first time so the events are only bound once
        if not hasattr(self, "popupID1"):
            self.popupID1 = wx.NewId()
            self.popupID2 = wx.NewId()
            self.Bind(wx.EVT_MENU, self.OnPopupOne, id=self.popupID1)
            self.Bind(wx.EVT_MENU, self.OnPopupTwo, id=self.popupID2)
        menu = wx.Menu()
        menu.Append(self.popupID1, "One")
        menu.Append(self.popupID2, "Two")
        self.PopupMenu(menu, event.GetPosition())
        menu.Destroy()
    def OnPopupOne(self, event):
        pass
    def OnPopupTwo(self, event):
        pass
There is one subtle thing in the code that needs some clarification. You only boud an event once. It resides in event table afterwards. If it is done in the constructor, everything is ok. But when you bound an event to a method in a method, you do it everytime when the method gets invoked. That's why we wrote a condition to ensure, we don't implement this overhead.
 if not hasattr(self, "popupID1"):
            self.popupID1 = wx.NewId()
            self.popupID2 = wx.NewId()
            self.Bind(wx.EVT_MENU, self.OnPopupOne, id=self.popupID1)
            self.Bind(wx.EVT_MENU, self.OnPopupTwo, id=self.popupID2)
The tiniest wxPython application
Feel free to contact me, if you can shorthen it. Even for one single character.
One-liner wxPython application
This is functionally equivalent to the tiniest wxPython application given above.
Interactive Button
This tip shows how to program an interactive Button. This button reacts to users actions. In our case, the button changes its background colour. When you enter the area of the button widget with a mouse pointer,
EVT_ENTER_WINDOW event is generated. Simirarly, EVT_LEAVE_WINDOW event is generated, when you leave the area of the widget. So all you have to do is to bind those events to functions, that will change the colour/shape of the button widget appropriately.
   1 #!/usr/bin/python
   2
   3 # interactivebutton.py
   4
   5 import wx
   6 import wx.lib.buttons  as  buttons
   7
   8 #---------------------------------------------------------------------------
   9
  10 class MyPanel(wx.Panel):
  11     def __init__(self, parent, id):
  12         wx.Panel.__init__(self, parent, -1, wx.DefaultPosition)
  13
  14         # Plain old text button based off GenButton().
  15         self.btn = buttons.GenButton(self, -1, "Button",
  16                                      pos=wx.Point(125, 100),
  17                                      size=(-1, -1))
  18         self.btn.SetFont(wx.Font(10, wx.FONTFAMILY_SWISS,
  19                                  wx.FONTSTYLE_NORMAL,
  20                                  wx.FONTWEIGHT_BOLD, False))
  21         self.btn.SetBezelWidth(1)
  22         self.btn.SetBackgroundColour(wx.LIGHT_GREY)
  23         self.btn.SetForegroundColour(wx.BLACK)
  24         self.btn.SetToolTip("This is a GenButton...")
  25
  26         #------------
  27
  28         self.btn.Bind(wx.EVT_ENTER_WINDOW, self.OnEnterButton)
  29         self.btn.Bind(wx.EVT_LEAVE_WINDOW, self.OnLeaveButton)
  30
  31     #-----------------------------------------------------------------------
  32
  33     def OnEnterButton(self, event):
  34         self.btn.SetBackgroundColour(wx.Colour(128, 128, 128))
  35         self.btn.Refresh()
  36
  37
  38     def OnLeaveButton(self, event):
  39         self.btn.SetBackgroundColour(wx.Colour(212, 208, 200))
  40         self.btn.Refresh()
  41
  42 #---------------------------------------------------------------------------
  43
  44 class MyApp(wx.App):
  45     def OnInit(self):
  46         frame = wx.Frame(None, -1, "Interactivebutton.py",
  47                          wx.DefaultPosition, wx.Size(350, 300))
  48         mypanel = MyPanel(frame, -1)
  49         frame.Centre()
  50         frame.Show(True)
  51         self.SetTopWindow(frame)
  52
  53         return True
  54
  55 #---------------------------------------------------------------------------
  56
  57 app = MyApp(0)
  58 app.MainLoop()
I have usedwx.GenButton instead of basic wx.Button. wx.GenButton enables to change border settigs, which I find attractive. But wx.Button would work as well.
Error handling without dialogs
Link : https://wiki.wxpython.org/How%20to%20create%20an%20alternative%20error%20messages%20(Phoenix)
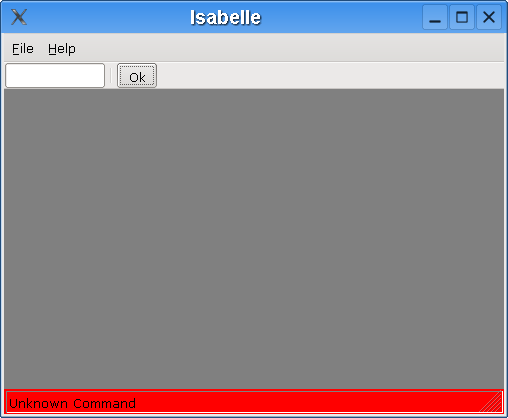
Figure: isabelle.py
UndoRedoFramework
Many applications have the ability to undo and redo the user's actions. The following example shows how it can be accomplished in wxPython.
   1 #!/usr/bin/python
   2
   3 # undoredo.py
   4
   5 """
   6 ZetCode wxPython tutorial
   7
   8 In this example, we create two horizontal
   9 toolbars.
  10
  11 author: Jan Bodnar
  12 website: www.zetcode.com
  13 last modified: April 2018
  14 """
  15
  16 import wx
  17
  18 #---------------------------------------------------------------------------
  19
  20 class Example(wx.Frame):
  21     def __init__(self, *args, **kwargs):
  22         super(Example, self).__init__(*args, **kwargs)
  23
  24         self.InitUI()
  25
  26     #-----------------------------------------------------------------------
  27
  28     def InitUI(self):
  29
  30         self.count = 5
  31
  32         #------------
  33
  34         self.toolbar = self.CreateToolBar()
  35         tundo = self.toolbar.AddTool(wx.ID_UNDO, '', wx.Bitmap('tundo.png'))
  36         tredo = self.toolbar.AddTool(wx.ID_REDO, '', wx.Bitmap('tredo.png'))
  37         self.toolbar.EnableTool(wx.ID_REDO, False)
  38         self.toolbar.AddSeparator()
  39         texit = self.toolbar.AddTool(wx.ID_EXIT, '', wx.Bitmap('texit.png'))
  40         self.toolbar.Realize()
  41
  42         #------------
  43
  44         self.Bind(wx.EVT_TOOL, self.OnQuit, texit)
  45         self.Bind(wx.EVT_TOOL, self.OnUndo, tundo)
  46         self.Bind(wx.EVT_TOOL, self.OnRedo, tredo)
  47
  48         #------------
  49
  50         self.SetSize((350, 250))
  51         self.SetTitle('Undoredo.py')
  52
  53         #------------
  54
  55         self.Centre()
  56
  57
  58     def OnUndo(self, event):
  59         if self.count > 1 and self.count <= 5:
  60             self.count = self.count - 1
  61
  62         if self.count == 1:
  63             self.toolbar.EnableTool(wx.ID_UNDO, False)
  64
  65         if self.count == 4:
  66             self.toolbar.EnableTool(wx.ID_REDO, True)
  67
  68
  69     def OnRedo(self, event):
  70         if self.count < 5 and self.count >= 1:
  71             self.count = self.count + 1
  72
  73         if self.count == 5:
  74             self.toolbar.EnableTool(wx.ID_REDO, False)
  75
  76         if self.count == 2:
  77             self.toolbar.EnableTool(wx.ID_UNDO, True)
  78
  79
  80     def OnQuit(self, event):
  81         self.Close()
  82
  83 #---------------------------------------------------------------------------
  84
  85 def main():
  86     app = wx.App()
  87     ex = Example(None)
  88     ex.Show()
  89     app.MainLoop()
  90
  91 #---------------------------------------------------------------------------
  92
  93 if __name__ == '__main__':
  94     main()
In our example, we want to undo and redo cell text changes and column and row size changes. So we must bind relevant events to our methods. These bindings are not visible in our sample code. You can find them in sheet.py file, in CSheet class:
self.Bind(wx.grid.EVT_GRID_ROW_SIZE, self.OnRowSize)
self.Bind(wx.grid.EVT_GRID_COL_SIZE, self.OnColSize)
self.Bind(wx.grid.EVT_GRID_CELL_CHANGE, self.OnCellChange)
In these three methods we create Undo objects. These objects areUndoText, UndoColSize and UndoRowSize. Each object has two methods. undo() and redo(). They are responsible for bringing to the state of the application before the change was done and vice versa. The objects are then appended to stockUndo list. This way we ensure, that all necessary changes are stored. Finally, when we press undo, redo buttons, we call OnUndo() and OnRedo() methods. The following method calls actually do the job:
a.undo()
a.redo()
The objects move between stockUndo and stockRedo lists accordingly. Also when there are no objects left, we disable a button with theEnableTool() method.
Figure: newt.py
Gripts
In this section we will show some small, complete scripts. These graphical scripts or "gripts" will demonstrate various areas in programming. Programming in Python, wxPython is easier than in most other toolkits. But it is still a laborious task. There is a long, long way from easy scripts to professional applications.
Tom
Each application should have a good name. Short and easily remembered. So, we have Tom. A simple gript that sends an email.
   1 #!/usr/bin/python
   2
   3 # Tom.py
   4
   5 import wx
   6 import smtplib
   7
   8 #---------------------------------------------------------------------------
   9
  10 class Tom(wx.Dialog):
  11     def __init__(self, parent, id, title):
  12         wx.Dialog.__init__(self, parent, id, title,
  13                            wx.DefaultPosition, wx.Size(400, 420))
  14
  15         panel = wx.Panel(self, -1)
  16
  17         st1 = wx.StaticText(panel, -1, 'From : ')
  18         st2 = wx.StaticText(panel, -1, 'To : ')
  19         st3 = wx.StaticText(panel, -1, 'Subject : ')
  20         self.tc1 = wx.TextCtrl(panel, -1, size=(180, -1))
  21         self.tc2 = wx.TextCtrl(panel, -1, size=(180, -1))
  22         self.tc3 = wx.TextCtrl(panel, -1, size=(180, -1))
  23         self.write = wx.TextCtrl(panel, -1, style=wx.TE_MULTILINE)
  24         button_send = wx.Button(panel, 1, '&Send')
  25
  26         #------------
  27
  28         vbox = wx.BoxSizer(wx.VERTICAL)
  29         hbox1 = wx.BoxSizer(wx.HORIZONTAL)
  30         hbox2 = wx.BoxSizer(wx.HORIZONTAL)
  31         hbox3 = wx.BoxSizer(wx.HORIZONTAL)
  32
  33         hbox1.Add(st1, 0, wx.LEFT, 10)
  34         hbox1.Add(self.tc1, 0, wx.LEFT, 20)
  35
  36         hbox2.Add(st2, 0, wx.LEFT, 10)
  37         hbox2.Add(self.tc2, 0, wx.LEFT, 35)
  38
  39         hbox3.Add(st3, 0, wx.LEFT, 10)
  40         hbox3.Add(self.tc3, 0, wx.LEFT, 9)
  41
  42         vbox.Add(hbox1, 0, wx.TOP, 10)
  43         vbox.Add(hbox2, 0, wx.TOP, 10)
  44         vbox.Add(hbox3, 0, wx.TOP, 10)
  45         vbox.Add(self.write, 1, wx.EXPAND | wx.TOP | wx.RIGHT | wx.LEFT, 15)
  46         vbox.Add(button_send, 0, wx.ALIGN_CENTER | wx.TOP | wx.BOTTOM, 20)
  47
  48         panel.SetSizer(vbox)
  49
  50         #------------
  51
  52         self.Bind(wx.EVT_BUTTON, self.OnSend, id=1)
  53
  54         #------------
  55
  56         self.Centre()
  57
  58     #-----------------------------------------------------------------------
  59
  60     def OnSend(self, event):
  61         sender = self.tc1.GetValue()
  62         recipient = self.tc2.GetValue()
  63         subject = self.tc3.GetValue()
  64         text = self.write.GetValue()
  65         header = 'From: %s\r\nTo: %s\r\nSubject: %s\r\n\r\n' % (sender, recipient, subject)
  66         message = header + text
  67
  68         try:
  69             server = smtplib.SMTP('mail.chello.sk')
  70             server.sendmail(sender, recipient, message)
  71             server.quit()
  72             dlg = wx.MessageDialog(self, 'Email was successfully sent',
  73                                    'Success', wx.OK | wx.ICON_INFORMATION)
  74             dlg.ShowModal()
  75             dlg.Destroy()
  76
  77         except smtplib.SMTPException as error:
  78             dlg = wx.MessageDialog(self, 'Failed to send email',
  79                                    'Error', wx.OK | wx.ICON_ERROR)
  80             dlg.ShowModal()
  81             dlg.Destroy()
  82
  83 #---------------------------------------------------------------------------
  84
  85 class MyApp(wx.App):
  86     def OnInit(self):
  87         frame = Tom(None, -1, 'Tom.py')
  88         frame.ShowModal()
  89         frame.Destroy()
  90
  91         return True
  92
  93 #---------------------------------------------------------------------------
  94
  95 app = MyApp(0)
  96 app.MainLoop()
For working with emails we need to import smtp module.
import smtplib
From, To and Subject options must be separated by carriedge return and newline as shown here. This weird thing is requested by RFC 821 norm. So we must follow it.
header = 'From: %s\r\nTo: %s\r\nSubject: %s\r\n\r\n' % (sender, recipient, subject)
Next we create an SMTP connection. Here you specify your settings. Each ISP gives you the name of the pop and smtp servers. In my case, 'mail.chello.sk' is a name for both. A mail is sent by calling the sendmail() method. Finally, we quit the connection with the quit() method.
server = smtplib.SMTP('mail.chello.sk')
server.sendmail(sender, recipient, message)
server.quit()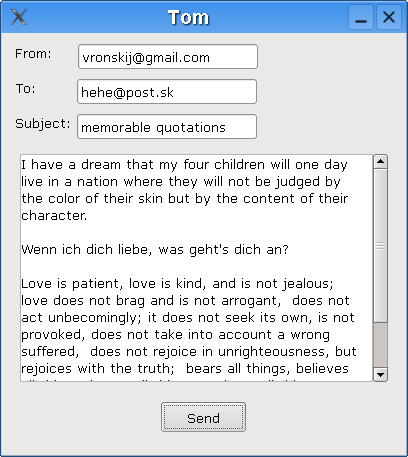
Figure: tom.py
Editor
Link : https://wiki.wxpython.org/How%20to%20create%20a%20simple%20text%20editor%20(Phoenix)#Sample_three
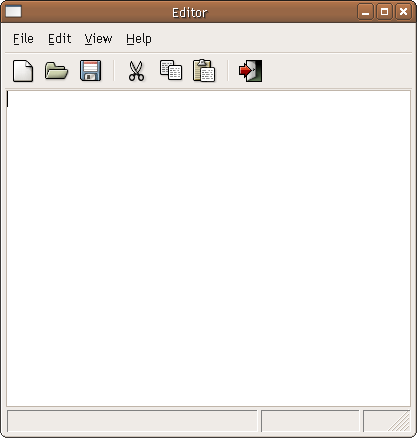
Figure: editor.py
Kika
Kika is a gript that connects to an ftp site. If a login is successfull, Kika shows a connected icon on the statusbar. Otherwise, a disconnected icon is displayed. We use an ftplib module from the python standard library. If you do not have an ftp account, you can try to login to some anonymous ftp sites.
   1 #!/usr/bin/python
   2
   3 # kika.py
   4
   5 from ftplib import FTP, all_errors
   6 import wx
   7
   8 #---------------------------------------------------------------------------
   9
  10 class MyStatusBar(wx.StatusBar):
  11     def __init__(self, parent):
  12         wx.StatusBar.__init__(self, parent)
  13
  14         self.SetFieldsCount(2)
  15         self.SetStatusText('Welcome to Kika', 0)
  16         self.SetStatusWidths([-5, -2])
  17
  18         #------------
  19
  20         self.icon = wx.StaticBitmap(self, -1, wx.Bitmap('icons/disconnected.png'))
  21
  22         #------------
  23
  24         self.Bind(wx.EVT_SIZE, self.OnSize)
  25
  26         #------------
  27
  28         self.PlaceIcon()
  29
  30     #-----------------------------------------------------------------------
  31
  32     def PlaceIcon(self):
  33         rect = self.GetFieldRect(1)
  34         self.icon.SetPosition((rect.x+3, rect.y+3))
  35
  36
  37     def OnSize(self, event):
  38         self.PlaceIcon()
  39
  40 #---------------------------------------------------------------------------
  41
  42 class MyFrame(wx.Frame):
  43     def __init__(self, parent, id, title):
  44         wx.Frame.__init__(self, parent, id, title, size=(270, 270))
  45
  46         self.ftp = None
  47
  48         #------------
  49
  50         self.SetMinSize((270, 270))
  51
  52         #------------
  53
  54         wx.StaticText(self, -1, 'Ftp site', (10, 20))
  55         wx.StaticText(self, -1, 'Login', (10, 60))
  56         wx.StaticText(self, -1, 'Password', (10, 100))
  57
  58         self.ftpsite = wx.TextCtrl(self, -1, '',  (110, 15), (120, -1))
  59         self.login = wx.TextCtrl(self, -1, '',  (110, 55), (120, -1))
  60         self.password = wx.TextCtrl(self, -1, '',  (110, 95), (120, -1), style=wx.TE_PASSWORD)
  61
  62         con = wx.Button(self, 1, 'Connect', (10, 160))
  63         discon = wx.Button(self, 2, 'DisConnect', (120, 160))
  64
  65         #------------
  66
  67         self.Bind(wx.EVT_BUTTON, self.OnConnect, id=1)
  68         self.Bind(wx.EVT_BUTTON, self.OnDisConnect, id=2)
  69
  70         #------------
  71
  72         self.statusbar = MyStatusBar(self)
  73         self.SetStatusBar(self.statusbar)
  74
  75         #------------
  76
  77         self.Centre()
  78
  79     #-----------------------------------------------------------------------
  80
  81     def OnConnect(self, event):
  82         if not self.ftp:
  83             ftpsite = self.ftpsite.GetValue()
  84             login = self.login.GetValue()
  85             password = self.password.GetValue()
  86
  87             try:
  88                 self.ftp = FTP(ftpsite)
  89                 var = self.ftp.login(login, password)
  90                 self.statusbar.SetStatusText('User connected')
  91                 self.statusbar.icon.SetBitmap(wx.Bitmap('icons/connected.png'))
  92
  93             except AttributeError:
  94                 self.statusbar.SetForegroundColour(wx.RED)
  95                 self.statusbar.SetStatusText('Incorrect params')
  96                 self.ftp = None
  97
  98             except all_errors as err:
  99                 self.statusbar.SetStatusText(str(err))
 100                 self.ftp = None
 101
 102
 103     def OnDisConnect(self, event):
 104         if self.ftp:
 105             self.ftp.quit()
 106             self.ftp = None
 107             self.statusbar.SetStatusText('User disconnected')
 108             self.statusbar.icon.SetBitmap(wx.Bitmap('icons/disconnected.png'))
 109
 110 #---------------------------------------------------------------------------
 111
 112 class MyApp(wx.App):
 113     def OnInit(self):
 114         frame = MyFrame(None, -1, 'Kika.py')
 115         frame.Show(True)
 116         return True
 117
 118 #---------------------------------------------------------------------------
 119
 120 app = MyApp(0)
 121 app.MainLoop()
Notice that each time the window is resized, we must position our icon to a new place.
def PlaceIcon(self):
    rect = self.GetFieldRect(1)
    self.icon.SetPosition((rect.x+3, rect.y+3))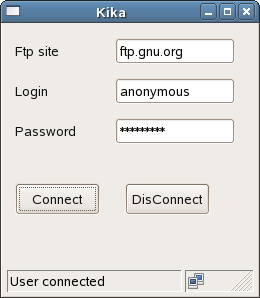
Figure: kika.py
Appendix
Cursor IDs
wx.CURSOR_ARROW |
wx.CURSOR_RIGHT_ARROW |
wx.CURSOR_BLANK |
wx.CURSOR_BULLSEYE |
wx.CURSOR_CHAR |
wx.CURSOR_CROSS |
wx.CURSOR_HAND |
wx.CURSOR_IBEAM |
wx.CURSOR_LEFT_BUTTON |
wx.CURSOR_MAGNIFIER |
wx.CURSOR_MIDDLE_BUTTON |
wx.CURSOR_NO_ENTRY |
wx.CURSOR_PAINT_BRUSH |
wx.CURSOR_PENCIL |
wx.CURSOR_POINT_LEFT |
wx.CURSOR_POINT_RIGHT |
wx.CURSOR_QUESTION_ARROW |
wx.CURSOR_RIGHT_BUTTON |
wx.CURSOR_SIZENESW |
wx.CURSOR_SIZENS |
wx.CURSOR_SIZENWSE |
wx.CURSOR_SIZEWE |
wx.CURSOR_SIZING |
wx.CURSOR_SPRAYCAN |
wx.CURSOR_WAIT |
wx.CURSOR_WATCH |
wx.CURSOR_ARROWWAIT |
wx.Frame styles
wx.DEFAULT_FRAME_STYLE |
wx.ICONIZE |
wx.FRAME_SHAPED |
wx.CAPTION |
wx.MINIMIZE |
wx.MINIMIZE_BOX |
wx.MAXIMIZE |
wx.MAXIMIZE_BOX |
wx.STAY_ON_TOP |
wx.SYSTEM_MENU |
wx.SIMPLE_BORDER |
wx.RESIZE_BORDER |
wx.FRAME_TOOL_WINDOW |
wx.FRAME_NO_TASKBAR |
wx.FRAME_FLOAT_ON_PARENT |
wx.FRAME_EX_CONTEXTHELP |
|
|
Standard Colour Database
AQUAMARINE |
BLACK |
BLUE |
BLUE VIOLET |
BROWN |
CADET BLUE |
CORAL |
CORNFLOWER BLUE |
CYAN |
DARK GREY |
DARK GREEN |
DARK OLIVE GREEN |
DARK ORCHID |
DARK SLATE BLUE |
DARK SLATE GREY |
DARK TURQUOISE |
DIM GREY |
FIREBRICK |
FOREST GREEN |
GOLD |
GOLDENROD |
GREY |
GREEN |
GREEN YELLOW |
INDIAN RED |
KHAKI |
LIGHT BLUE |
LIGHT GREY |
LIGHT STEEL BLUE |
LIME GREEN |
MAGENTA |
MAROON |
MEDIUM AQUAMARINE |
MEDIUM BLUE |
MEDIUM FOREST GREEN |
MEDIUM GOLDENROD |
MEDIUM ORCHID |
MEDIUM SEA GREEN |
MEDIUM SLATE BLUE |
MEDIUM SPRING GREEN |
MEDIUM TURQUOISE |
MEDIUM VIOLET RED |
MIDNIGHT BLUE |
NAVY |
ORANGE |
ORANGE RED |
ORCHID |
PALE GREEN |
PINK |
PLUM |
PURPLE |
RED |
SALMON |
SEA GREEN |
SIENNA |
SKY BLUE |
SLATE BLUE |
SPRING GREEN |
STEEL BLUE |
TAN |
THISTLE |
TURQUOISE |
VIOLET |
VIOLET RED |
WHEAT |
WHITE |
YELLOW |
YELLOW GREEN |
wx.Pen styles
wx.SOLID |
wx.TRANSPARENT |
wx.DOT |
wx.LONG_DASH |
wx.SHORT_DASH |
wx.DOT_DASH |
wx.STIPPLE |
wx.USER_DASH |
wx.BDIAGONAL_HATCH |
wx.CROSSDIAG_HATCH |
wx.FDIAGONAL_HATCH |
wx.CROSS_HATCH |
wx.HORIZONTAL_HATCH |
wx.VERTICAL_HATCH |
wx.Brush styles
wx.BLUE_BRUSH |
wx.GREEN_BRUSH |
wx.WHITE_BRUSH |
wx.BLACK_BRUSH |
wx.GREY_BRUSH |
wx.MEDIUM_GREY_BRUSH |
wx.LIGHT_GREY_BRUSH |
wx.TRANSPARENT_BRUSH |
wx.CYAN_BRUSH |
wx.RED_BRUSH |
CalendarCtrl styles
CAL_SUNDAY_FIRST |
CAL_MONDAY_FIRST |
CAL_SHOW_HOLIDAYS |
CAL_NO_YEAR_CHANGE |
|
CAL_NO_MONTH_CHANGE |
CAL_SEQUENTIAL_MONTH_SELECTION |
CAL_SHOW_SURROUNDING_WEEKS |
CAL_HITTEST_NOWHERE |
|
CAL_HITTEST_HEADER |
CAL_HITTEST_DAY |
CAL_HITTEST_INCMONTH |
CAL_HITTEST_DECMONTH |
|
CAL_HITTEST_SURROUNDING_WEEK |
CAL_BORDER_NONE |
CAL_BORDER_SQUARE |
CAL_BORDER_ROUND |
|
Keycodes
WXK_BACK |
WXK_TAB |
WXK_RETURN |
WXK_ESCAPE |
WXK_SPACE |
WXK_DELETE |
WXK_START |
WXK_LBUTTON |
WXK_RBUTTON |
WXK_CANCEL |
WXK_MBUTTON |
WXK_CLEAR |
WXK_SHIFT |
WXK_CONTROL |
WXK_MENU |
WXK_PAUSE |
WXK_CAPITAL |
WXK_PRIOR |
WXK_NEXT |
WXK_END |
WXK_HOME |
WXK_LEFT |
WXK_UP |
WXK_RIGHT |
WXK_DOWN |
WXK_SELECT |
WXK_PRINT |
WXK_EXECUTE |
WXK_SNAPSHOT |
WXK_INSERT |
WXK_HELP |
WXK_NUMPAD0 |
WXK_NUMPAD1 |
WXK_NUMPAD2 |
WXK_NUMPAD3 |
WXK_NUMPAD4 |
WXK_NUMPAD5 |
WXK_NUMPAD6 |
WXK_NUMPAD7 |
WXK_NUMPAD8 |
WXK_NUMPAD9 |
WXK_MULTIPLY |
WXK_ADD |
WXK_SEPARATOR |
WXK_SUBTRACT |
WXK_DECIMAL |
WXK_DIVIDE |
WXK_F1 |
WXK_F2 |
WXK_F3 |
WXK_F4 |
WXK_F5 |
WXK_F6 |
WXK_F7 |
WXK_F8 |
WXK_F9 |
WXK_F10 |
WXK_F11 |
WXK_F12 |
WXK_F13 |
WXK_F14 |
WXK_F15 |
WXK_F16 |
WXK_F17 |
WXK_F18 |
WXK_F19 |
WXK_F20 |
WXK_F21 |
WXK_F22 |
WXK_F23 |
WXK_F24 |
WXK_NUMLOCK |
WXK_SCROLL |
WXK_PAGEUP |
WXK_PAGEDOWN |
WXK_NUMPAD_SPACE |
WXK_NUMPAD_TAB |
WXK_NUMPAD_ENTER |
WXK_NUMPAD_F1 |
WXK_NUMPAD_F2 |
WXK_NUMPAD_F3 |
WXK_NUMPAD_F4 |
WXK_NUMPAD_HOME |
WXK_NUMPAD_LEFT |
WXK_NUMPAD_UP |
WXK_NUMPAD_RIGHT |
WXK_NUMPAD_DOWN |
WXK_NUMPAD_PRIOR |
WXK_NUMPAD_PAGEUP |
WXK_NUMPAD_NEXT |
WXK_NUMPAD_PAGEDOWN |
WXK_NUMPAD_END |
WXK_NUMPAD_BEGIN |
WXK_NUMPAD_INSERT |
WXK_NUMPAD_DELETE |
WXK_NUMPAD_EQUAL |
WXK_NUMPAD_MULTIPLY |
WXK_NUMPAD_ADD |
WXK_NUMPAD_SEPARATOR |
|
WXK_NUMPAD_SUBTRACT |
|
WXK_NUMPAD_DECIMAL |
WXK_NUMPAD_DIVIDE |
Comments...
Date (d/m/y) Person (bot) Comments :
??/04/05 - Jan Bodnar / ZetCode (Created page for wxPython).
??/??/?? - Adil Hasan (I've added a little example extending the wx.TreeCtrl example to create a window with a tree and moveable splitter window at AnotherTutorialTreeCtrlComment).
03/11/20 - Ecco (Updated examples for wxPython Phoenix (only scripts)).
